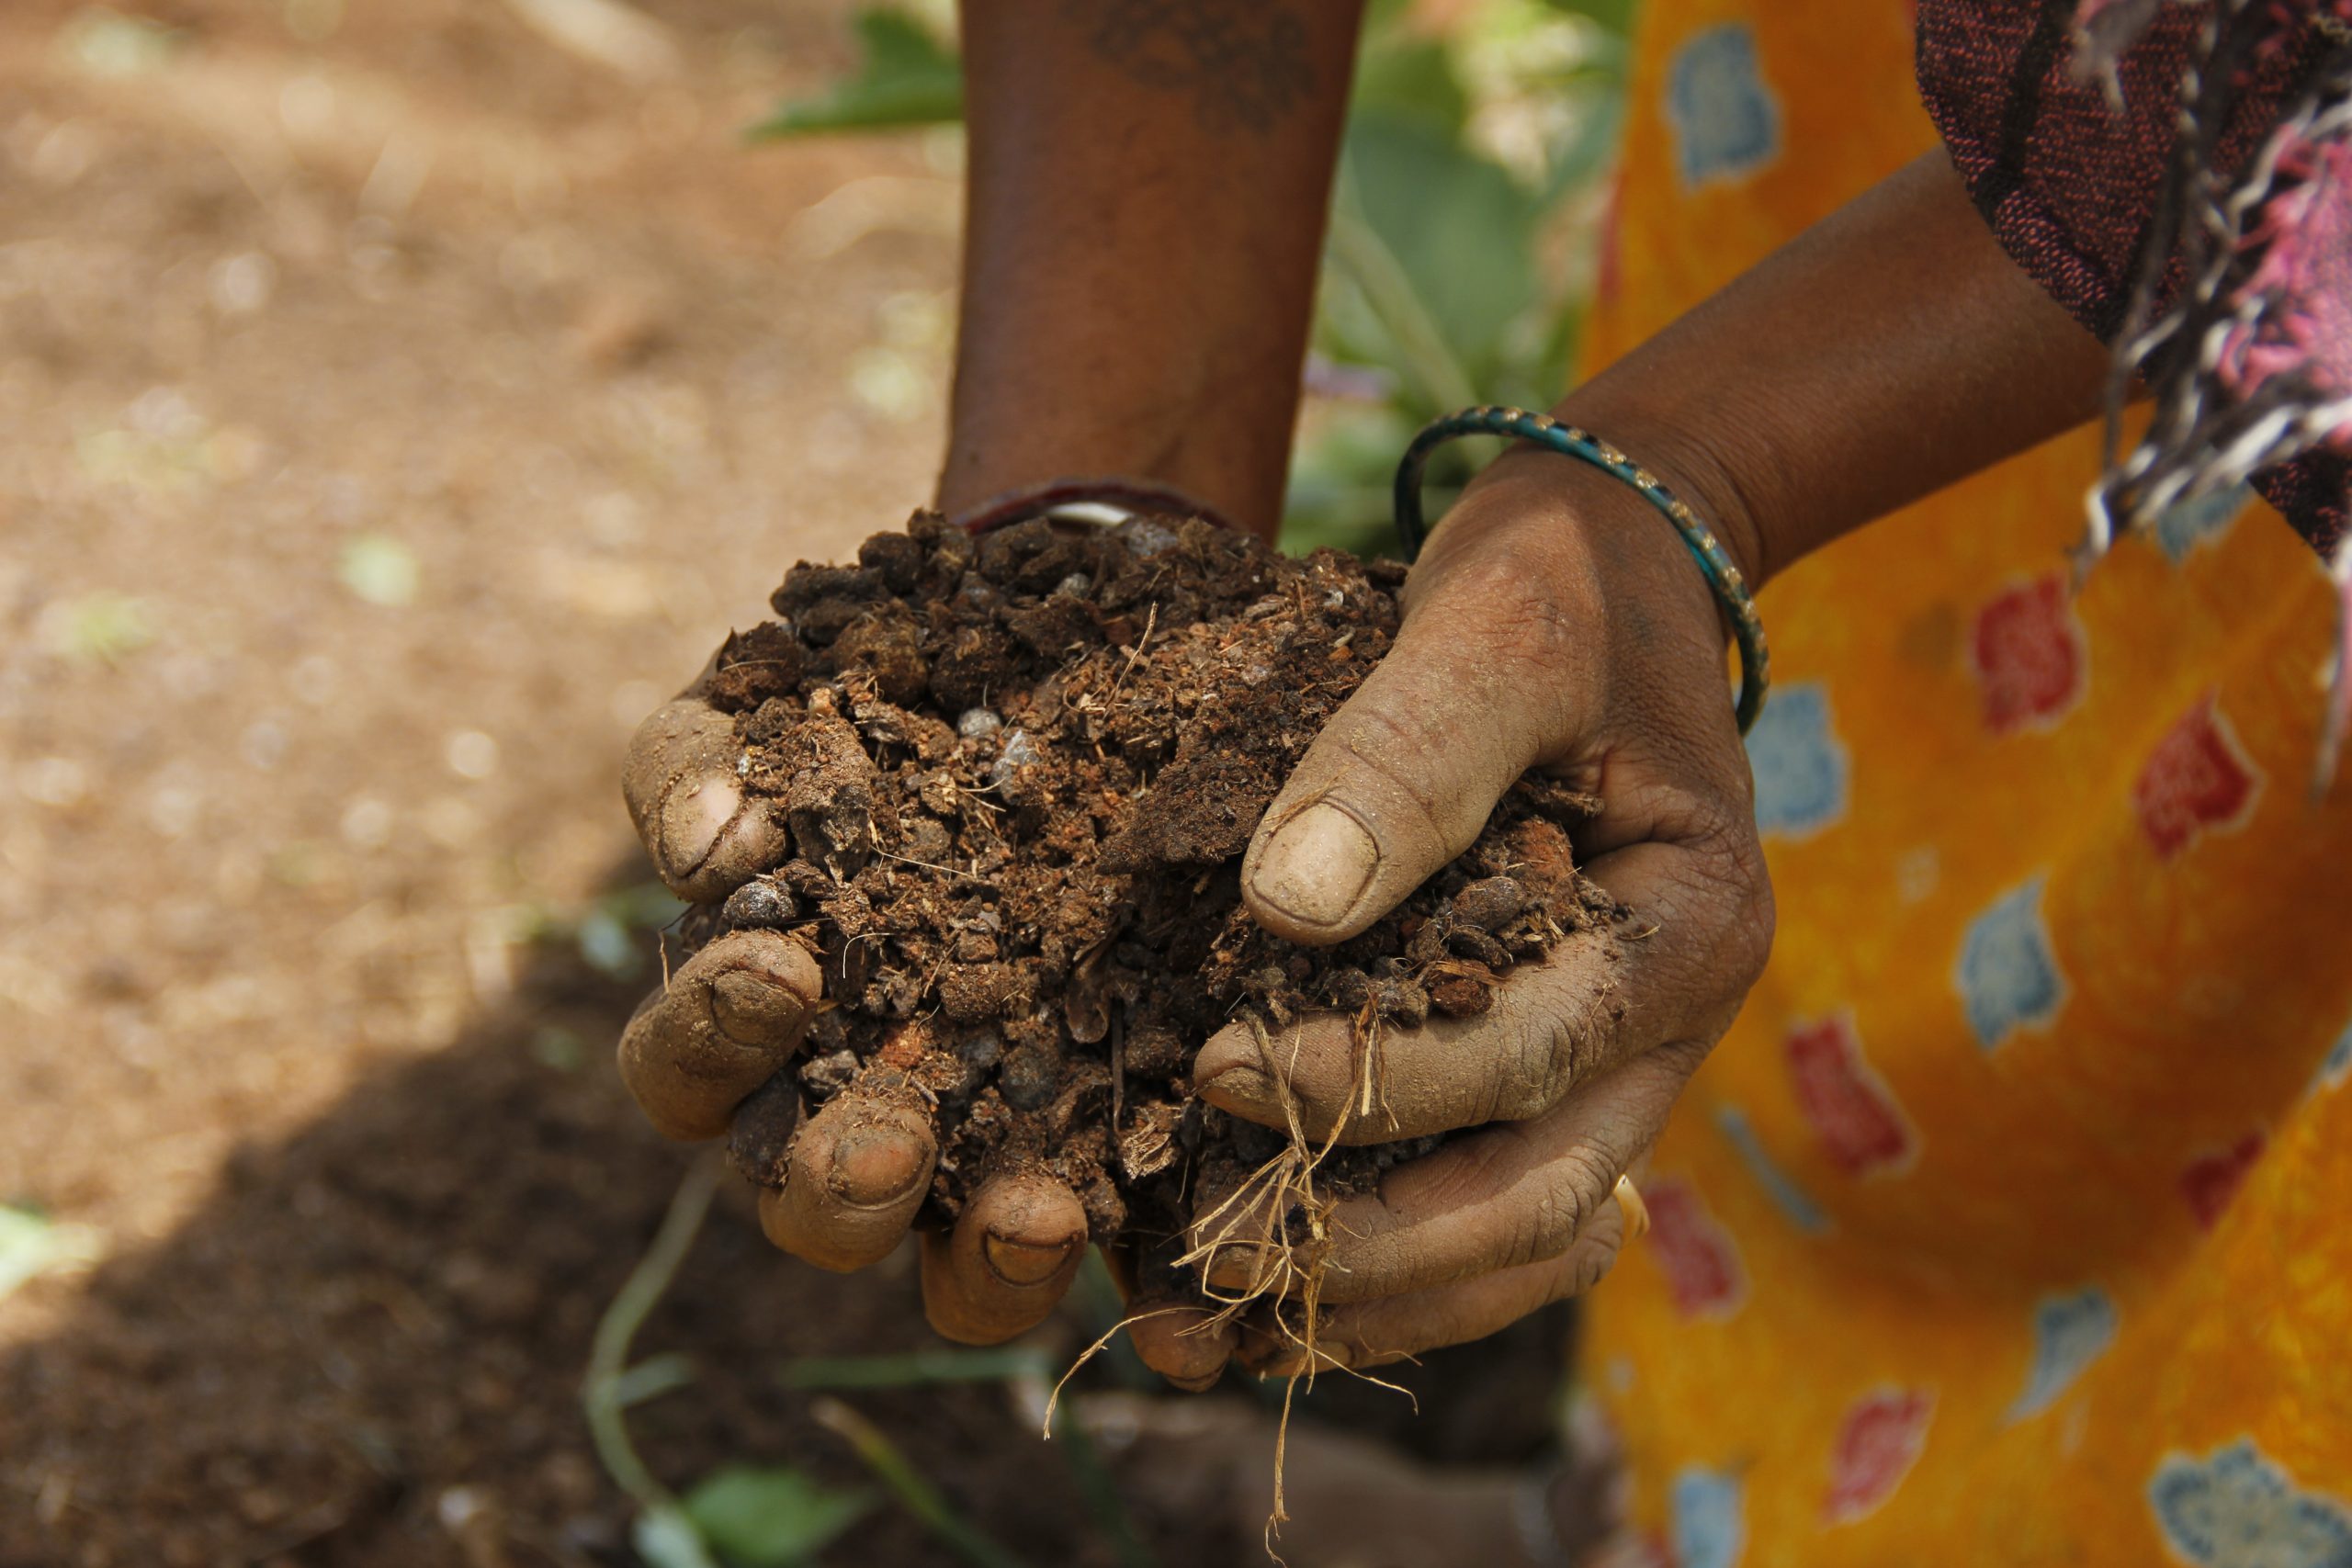
Healthy soil is the foundation of everything we grow. Beneath the surface lies a network of microbes, roots, minerals, and organic matter, all working together to shape crop health and yield. That’s why, in Kai Thota, the very first step is always to care for the soil. We test it, observe it, and nurture it. This section is about building a true relationship with the land: learning to understand what the soil needs, restoring it if it’s weak, and planning crops in ways that keep it fertile and thriving, season after season.
01. How Can You Test the Soil?
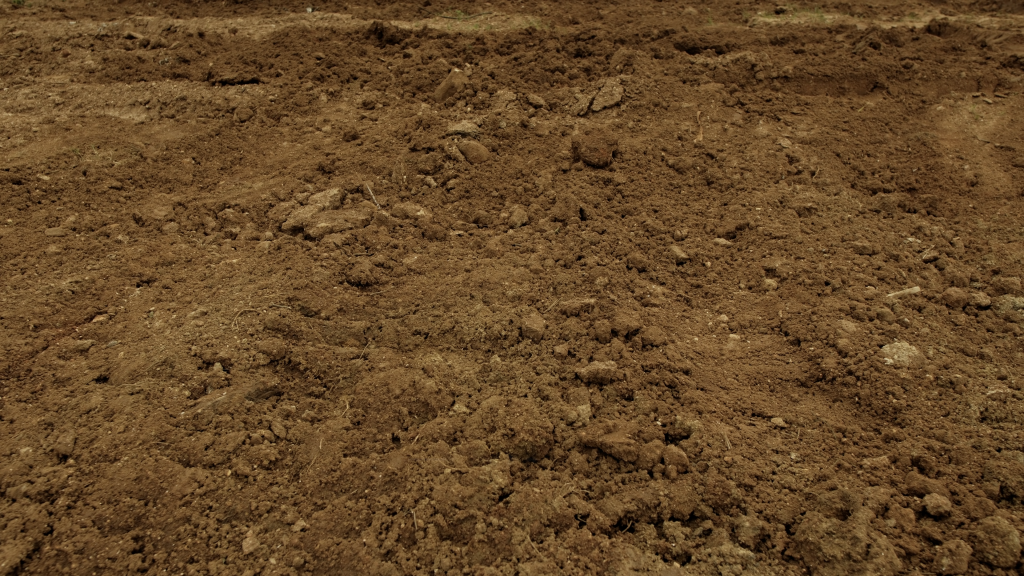
Good soil means healthy crops. Testing soil helps us understand what it needs—like giving food to our plants. It tells us if soil is too dry, too hard, or missing nutrients. This helps us choose the right crops, irrigation methods, and avoid wasting time, effort, or money.
Before you test, you need to collect the right soil:
- Take samples from 6 to 7 different spots in your farm.
- For vegetables, dig up to 1 foot deep.
- Mix all the samples together in a clean container.
| 💡 Tip |
| From this mix, keep aside a small portion—just 3 grams—if you’re sending it to a lab. |

“We sent the soil from our farm to a lab to understand it better. You can send you soil for testing”
____
Shivamma
Three simple methods to start understanding your soil
- Bottling Method
You will need your soil mix and any clear bottle
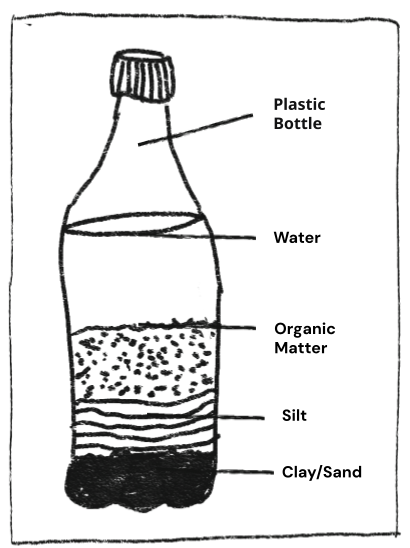
- Put some of your soil mix in a clear bottle with water. Fill one-third of the bottle with the soil mix and the rest with water.
- Shake it well and let it sit overnight. Do not move the bottle or disturb your mix!
- The soil will settle in layers: dark bits on the top (like organic matter), fine soil in the middle (like silt), and heavy stuff at the bottom (like sand or clay).
- The size and colour of each layer can tell you what your soil is made of and what it might need.
| 💡 Tip |
| Look at the top dark layer after the soil settles. This layer shows the organic matter. If it takes up about one-third your entire layer, your soil has good organic content. The more of this dark layer you see, the healthier your soil is! |
- Funnel Method
You will need your soil mix, a plastic water bottle (the ones that have a tapering top, like thumbs up) and a muslin cloth
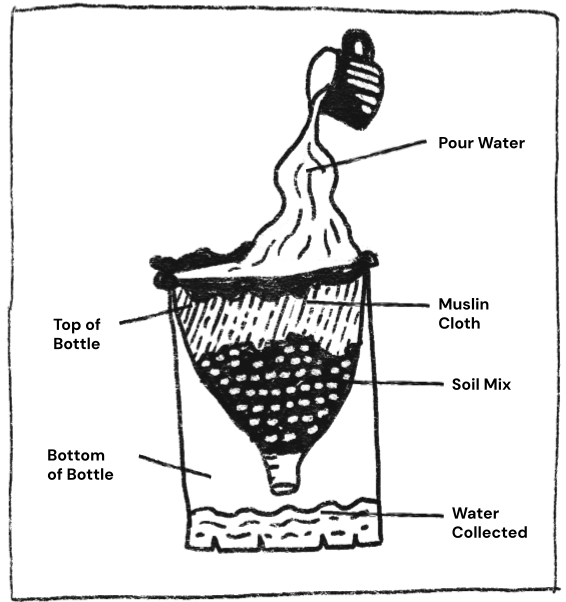
- Cut the top tapering part of the water bottle to create your own funnel (link to video/ sketch)
- Put a muslin cloth inside this funnel and add some of your soil mix to this funnel.
- Place this over another container and carefully pour water on the mix. Make sure you don’t end up flooding the soil mix too much!
- It can take several hours for the water to drain through. How much time it takes shows you how your soil holds or drains water.
| 💡 Tip |
| Fast-draining soil may dry out quickly; slow-draining soil may stay too wet and this is important for crops like leafy greens and root veggies. |
- pH Test
You will need your soil mix, vinegar, baking soda, water and 2 small containers
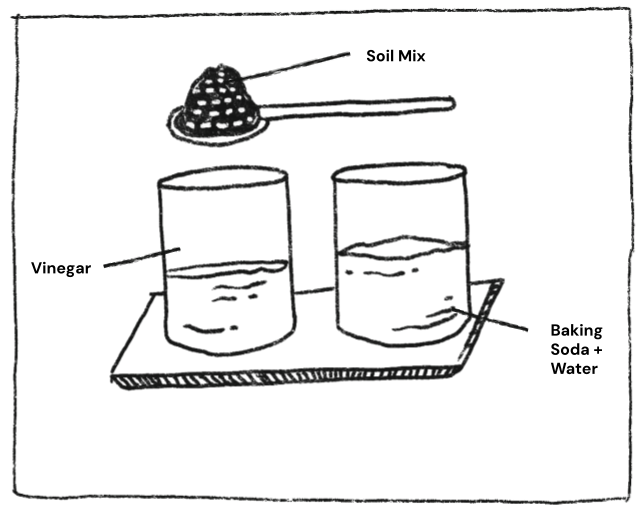
- Mix a small amount of your soil with vinegar in one container. If it fizzes, the soil is alkaline (basic).
- Mix your soil with baking soda and water in another container. If it fizzes, the soil is acidic.
- If no reaction happens when you mix the soil with vinegar and baking soda, the soil is likely neutral.
📖 Advanced Terms
🌟pH tells you how healthy your soil is and if it can be used to grow different types of plants. It measures if the soil is more acidic or more alkaline.
🌟Acidic: if your soil is acidic, it has low pH. This means that some nutrients that your soil really needs like phosphorus could be less present. Acidic soil also increases some toxic elements like aluminium in your soil which can damage your plant roots in the future!
🌟Alkaline: if your soil is alkaline, it has high pH. This means your soil may have more calcium carbonate which may make it hard and chalky. In the long term, this can affect your soil health by making some required nutrients less available. Your plants could end up with yellow and curled leaves or purple stems!
🌟Balanced pH: Your soil should have a balanced pH, not too acidic, not too alkaline, for good health and plant growth. This makes sure that all required plant nutrients are present for your plant roots to soak up.
While these simple home tests help you start understanding your soil, lab tests give you more accurate details about the health of your soil. You can use your home tests to get a rough idea but do consider sending a small sample of your soil mix to a nearby lab for a full test. This will help you understand what nutrients are missing and also help you plan better. Together, both methods give you a full picture—one is easy and quick, the other is detailed and precise.
Home tests are a great first step to understand your soil—its texture, how it drains, and general health. They help you observe and learn from your land. But for more exact information, like pH levels and missing nutrients, lab tests are very useful. Together, both methods give you a fuller picture—home tests help you notice changes, lab tests help you make better decisions.
02. How Can You Keep the Soil Fertile?
Step 1: Prepare your soil before you start producing
Once you test your soil, you may find that your soil is degraded. Green manuring is a process that you can follow to nurse your soil back to good condition.
Green Manuring
Green manuring is a way of farming that helps bring life back to the soil. In this method, farmers grow special plants, not to harvest, but to mix back into the soil for the sole reason of improving the soil condition. These special plants add natural matter, give the soil more nitrogen, and make it soft and healthy. They also help grow good microbes and fungi in the soil.
Follow these steps for Green Manuring-
- Loosen the soil
Break up the top layer of the soil gently with your tools so the seeds can go in easily. Make sure you do not dig too deep
- Seed selection
You will need 9-17 seed varieties. Choose them based on the season, what’s available nearby, and what your soil needs.
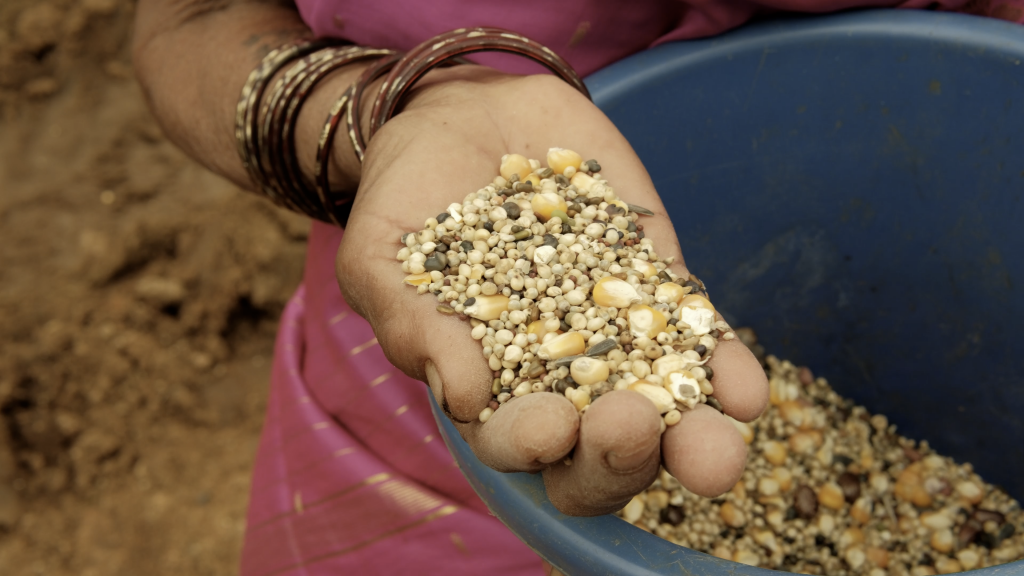
Here are some commonly used seed combinations that you can try using-
- Legumes: Horse gram, green gram, urad dal (for nitrogen fixation)
- Oilseeds: Sesame, flax (for biomass)
- Cereals: Ragi, foxtail millet (for root diversity and structure)
- Others: Sunhemp, cowpea (for quick growth and coverage)
📖 Advanced Terms
🌟 Nitrogen fixation means getting nitrogen into your soil. This will help make your soil more fertile without using chemical fertilisers.
🌟 Biomass is like natural compost.
🌟Root diversity is needed because some roots go deep into the soil and some do not. Having both types of roots helps the soil stay loose, brings up nutrients from deep down, and supports more soil life.
- Sowing
- Seeds are spread over the farm by hand
- The goal is to densely cover the soil, so don’t worry about spacing out the seeds!
- Growth Period
- Allow the plants to grow for about 45-60 days
- When 20-30% of the crops start flowering, you can begin the next part of the process
- Final Stage
- Gently dig and mix the green plants into the top layer of the soil. This adds natural food and other nutrients to the soil.
- Press down the plant stems near the ground without pulling them out. This makes a cover on the soil that breaks down slowly and keeps the soil healthy. It also protects the helpful fungi in the soil.
| 💡 Tip |
| For very weak or damaged soil, farmers use Velvet Beans (Mucuna pruriens). This plant grows fast and covers the ground like a blanket. It helps stop weeds and keeps the soil moist. It also adds nitrogen to the soil. Farmers leave it on the land for a few months, or even up to a year, if the soil is in very bad shape. It is not used in vegetable beds because it spreads too quickly and takes up too much space. |

“We used velvet beans for a year—we saw a huge difference. From tight or dead soil to something healthy, living, and fragrant.”
____
Vishala
Step 2: Rebuild your soil for the next cycle

“In a Kai Thota, you’re always sowing, harvesting, replenishing.
It doesn’t stop—it just flows.”
____
Selvi
The Kai Thota method encourages you to grow crops round the year. But for this to work, your soil needs to stay healthy — and that means giving it food, cover, and rest between growing cycles.
Below are some simple, low-cost ways to nourish and protect your soil before the next crop. You don’t have to follow every step at once — just pick what works best for your land, time, and resources. You can cycle through these methods throughout the production to keep your soil strong and full of life.
Crop Rotation
If you want to grow crops all year round, it’s important to think about rotating your plants. This means not growing the same crop in the same bed every time.
You can start with a few simple changes, depending on the weather and what’s in demand at the market:
- Follow leafy vegetables with root crops.
- After growing heavy feeders like brinjal or tomato, switch to light feeders such as legumes.
- After cereal, try planting pulses.
This helps as each plant uses and returns different nutrients to the soil. Rotating crops keeps your soil balanced and stops pests from coming back.
You should ideally plan your crop rotation before planting your next batch and decide what goes where.
Resting Beds
Alternatively, you can also give some beds a rest. For example, if you have 10 beds, pick 1 or 2 beds to leave empty for a few weeks (or 30-45 days).
| 💡 Tip |
| You can do this especially when:Your soil feels too hard or dry,There’s been a pest or disease issue in a particular area — resting the bed can help break the cycleCrops there have been growing slower or giving lower yield |
Letting the soil rest gives it time to recover, hold more water, rebuild nutrients, and invite helpful organisms like worms and microbes back in.
Caring for Resting Beds: To give your soil an extra boost during rest periods or between production cycles, you can try some simple methods:
- Green Manure: You may remember green manure – it’s when you grow special plants, not to harvest, but to mix back into the soil.
- You can grow them in between crops or during rest periods
- Bend, turn or mix them into the soil, once they start to flower
- It’s a simple way to keep the soil rich and full of nutrients
- Keep What’s Left – Mulch and Residue
After harvesting, don’t throw “the waste” away!- Leave behind crop remains like stems, dry leaves, straw or weeds
- Pile and cover the soil with the mixture and let it sit, especially after green manuring
- This is called mulching, and it helps:
- Keep the soil moist
- Stop weeds
- Feed the microbes below the surface
- Using Weeds Smartly
We know that not all weeds are bad. Some, like amaranth or bhangra, are very helpful. When cleaning your farm, pick these weeds separately. You can use them to make fermented weed tea—a natural fertilizer made of chopped weeds and biowaste, poured near your crop roots to help them grow better.
How to Make Fermented Weed Tea:
- Collect Weeds: Gather a variety of weeds, including nutritious ones like amaranth or bhangra, and chop them into small pieces or a mash.
- Place the chopped weeds into a large bucket or container, filling it to about three-quarters capacity.
- Cover the weeds with water, using rainwater if possible, to completely submerge the plant material.
- Cover the bucket to ferment this mixture with a loose lid or screen to keep out insects while allowing gases to escape.
- Stir the mixture regularly for a period of one to four weeks. The process is complete when the weeds have mostly dissolved and the liquid turns a dark brown color.
- Once the fermentation is complete, strain out the solid plant material using a sieve or muslin cloth, keeping the liquid for use as fertilizer.
How to Use Fermented Weed Tea:
- Soil Drench: Use the tea as a direct fertilizer by pouring it onto the soil around the base of plants.
- Spray: You could also dilute the tea with water until it is the color of weak tea and use a spray bottle to apply it to the leaves of plants for foliar feeding.
📖 Advanced Terms
🌟 Foliar Feeding is a technique where nutrient-rich liquids, like fermented weed tea or Dashaparani, are sprayed directly onto the leaves. This helps the plant quickly absorb food and nutrients through its leaf surface.
🌟You can do this using a spray bottle — this is called a foliar spray.
🌟Why it’s useful:Works faster than soil feeding.
- Helps when plants look weak or sick.
- Best for small nutrients (micronutrients).
- Good for quick fixes, not for giving big amounts of food.
These small practices—resting your beds, rotating crops, mulching, and feeding the soil—may seem simple, but they’re powerful. Done consistently, they keep your land fertile, reduce the need for outside inputs, and make it easier to grow healthier plants. Every harvest becomes the foundation for the next. 🌱
Ps: In the upcoming chapter, you’ll learn how to protect both your soil’s fertility and your crops’ health as they grow.
Resources
Additional Resources
🔗 Soil Vasu on Soil Health
🔗 Soil Health Playbook