After harvest, the way you handle your vegetables affects their freshness and how much your community trusts your farm. By sorting, packing, delivering, and keeping in touch with your subscribers or buyers, you make sure your food arrives in the best condition—and that families keep coming back for more. Here is how you can do it
01. How Do You Sort and Prepare Your Vegetables?
Once you’ve harvested your crops, the next important step is to sort, weigh, and prepare them carefully—especially if they’re going to the market or subscribers.
Here’s what you can do:
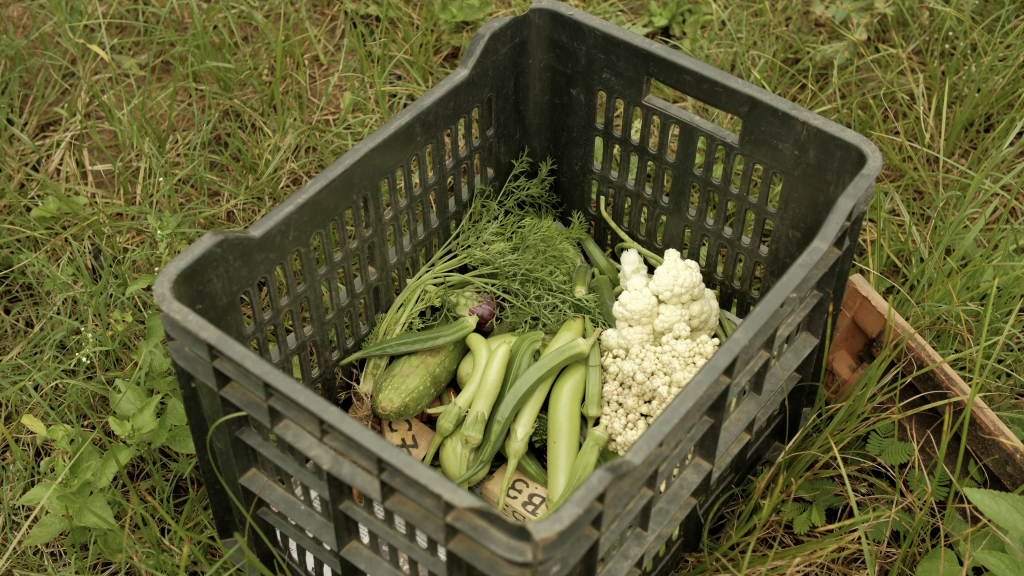
Sort the produce: Group by type and size (small, medium, large). Remove damaged or overripe items — use these for compost or liquid manure.
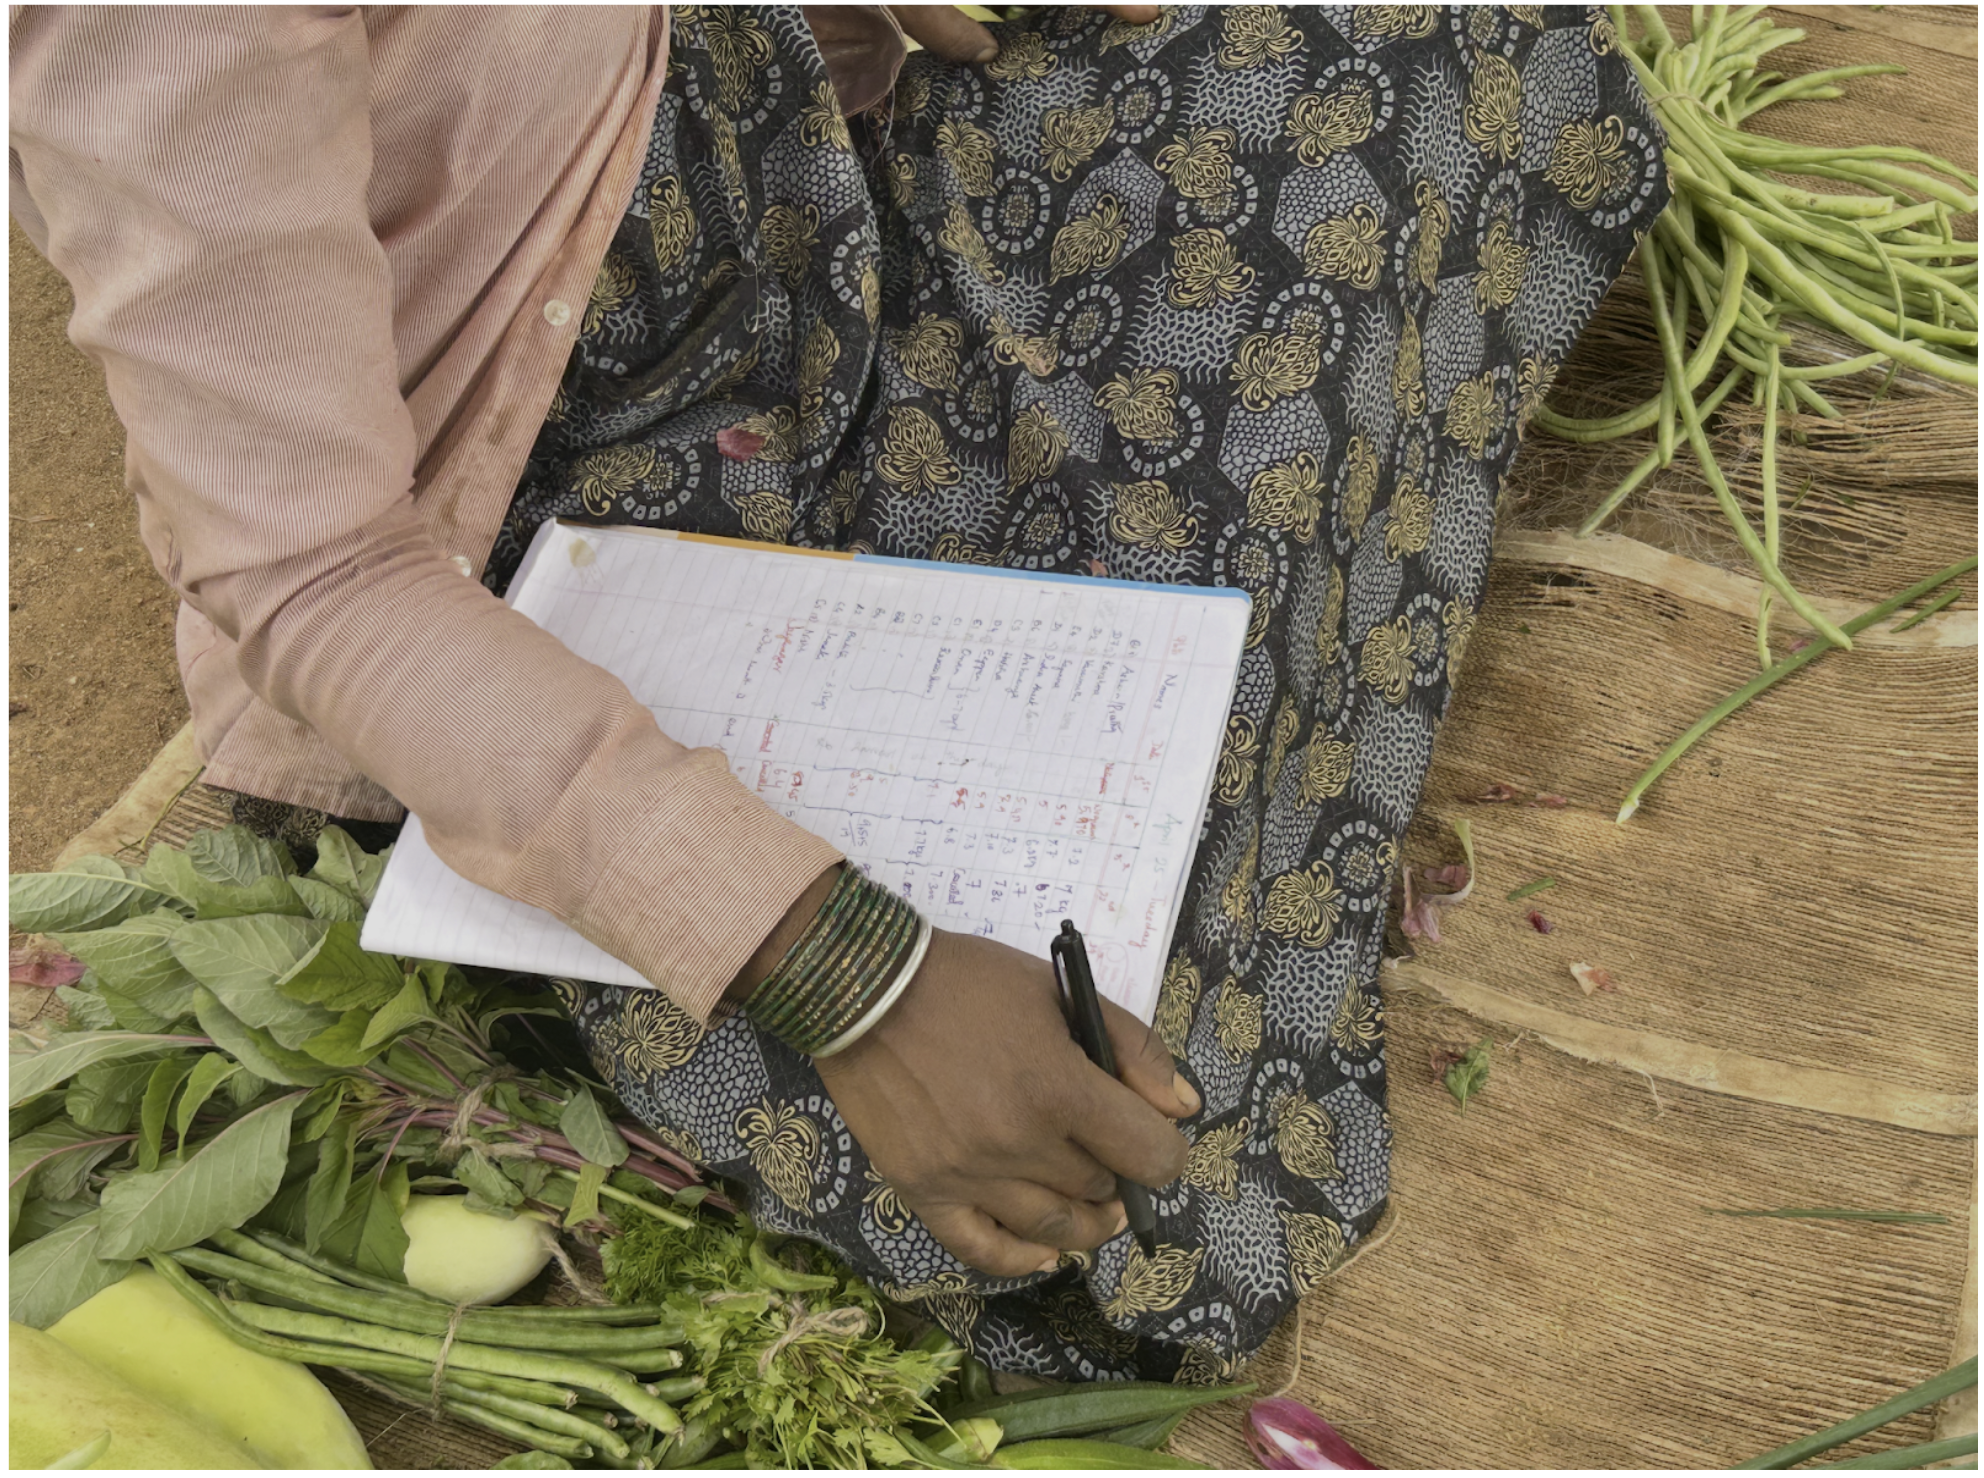
Weigh: Weigh each crop type using a scale.
Record: Note down the date, crop name, weight, and where it’s going (market, home, subscription).
Label and Pack: Pack vegetables in clean, dry bags or crates — avoid crushing or mixing soft and hard vegetables. Add labels to them to avoid confusion especially if sending to multiple buyers.
Take photos of the produce to share with consumers and to keep a record for yourself.
📹 Watch this video to see how we harvest
02. How do you deliver vegetables to CSAsubscribers?
You could consider the following delivery options for your CSA:
Home Delivery – Convenient for subscribers, but needs time and transport planning
Pickup Points – Vegetables are dropped at a common location (e.g. schools, Anganwadis, bus stop) and collected by subscribers. This is simpler and saves effort.
Why does communication matter as much as delivery?
Selling vegetables is not the end of the work. In Kai Thota, what makes the model special is the relationship between the farm and the people who eat the food. That relationship grows stronger when there is regular, simple communication.
Subscribers want to know where their food is coming from and that the farmers growing them are well compensated for their time and efforts. When you share small updates, stories from the farm, or even cooking tips, they feel part of your journey—not just like buyers. Good communication builds trust, care, and community—and helps your farm grow stronger.
03. What Are Some Simple Ways to Stay Connected With Your Customers?
You don’t need fancy tools or constant updates. Just pick a few simple practices and stick with them.
What You Can Do
How Often
Tools You Can Use
Send a short message or photo from the farm
Once a week or month
WhatsApp or SMS
Share local recipes or cooking tips
When a veggie repeats
Word of mouth, WhatsApp
Give updates on weather achievements, or harvest
As needed
WhatsApp, during pickup, or visits
Invite subscribers to visit the farm and share a simple meal with them
Often or As needed
WhatsApp or SMS
Thank your subscribers
During festivals or good harvests
Handwritten note, extra veggie
💡 Tip
If the same vegetable is going out every week, add a line like: “This keerai was grown from seeds we saved ourselves!” or “Try it with coconut—it’s tasty!”
We (Bhagya, Chandramma, and myself) are at the 2nd National Women Farmers’ Convention in Pune. It’s a proud and joyful moment to be here with so many women farmers. Together, we are the future of agriculture—caring for the Earth and standing strong for our rights. A big thank you to all of you for your constant support and encouragement through every challenge we face. 🙏 And some happy news—Bhagya and Chandramma took their very first train journey to get here! 😀🚂 It has been a truly exciting experience.
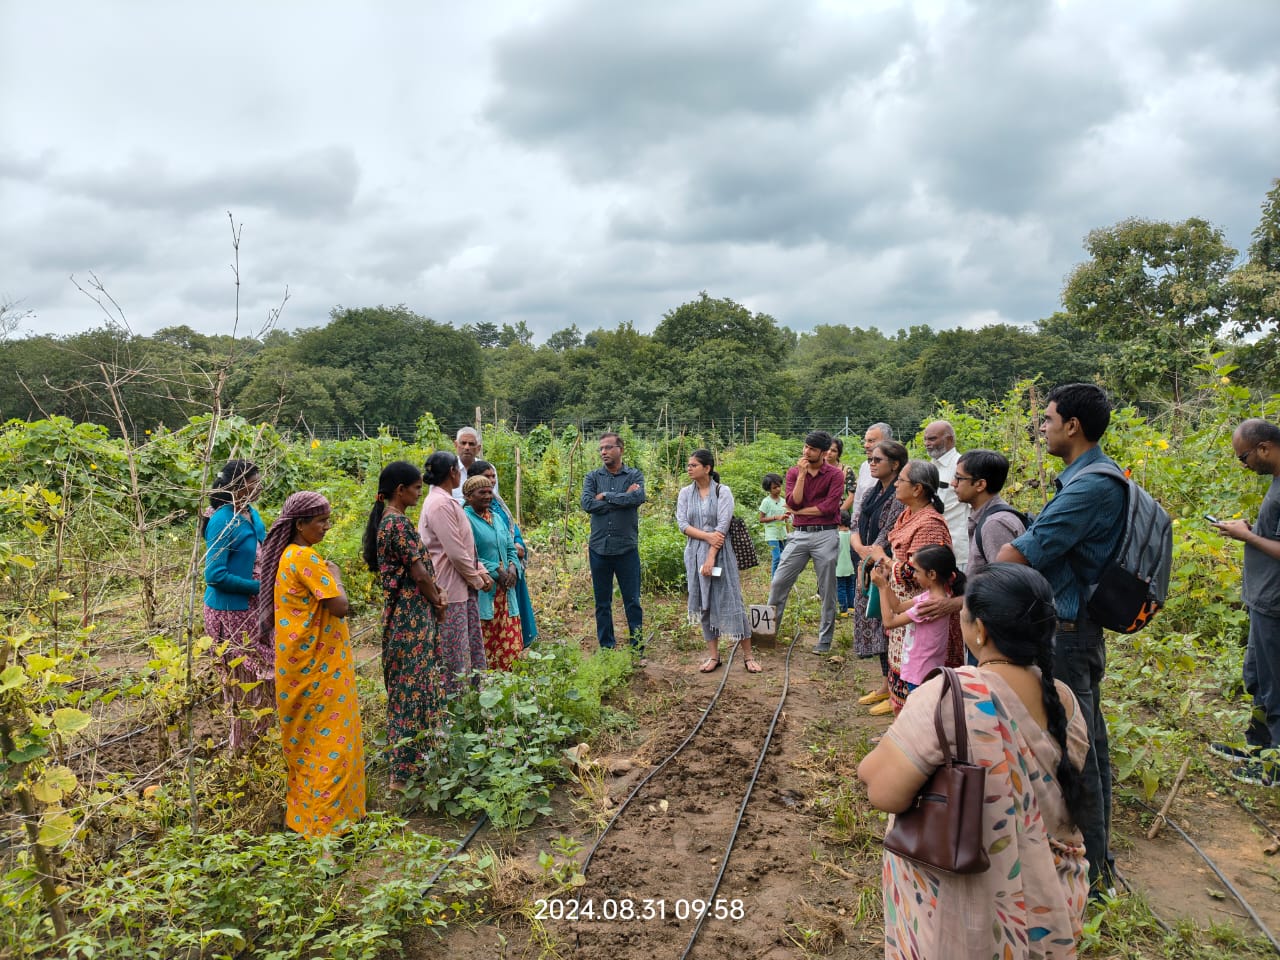
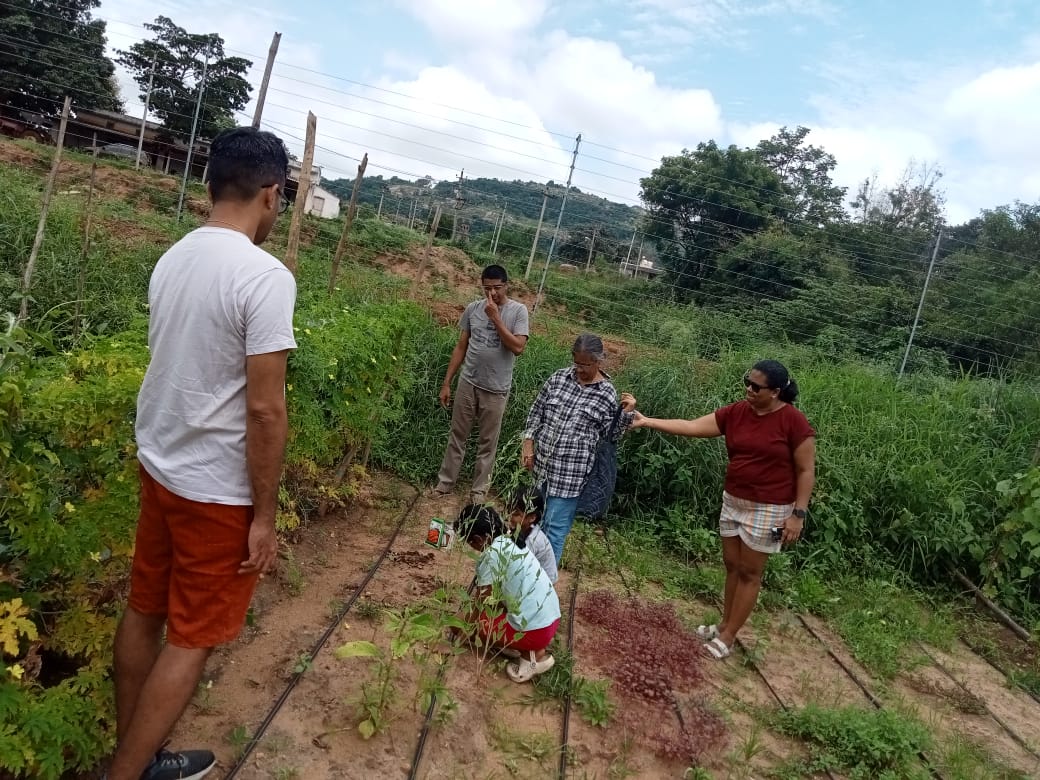
Engagement With Consumers-
Most of you who’ve visited us know that Ragihalli is one of the 16 villages in the Ecologically Sensitive Zone (ESZ) around Bannerghatta National Park. Our work here goes beyond just agriculture and conservation—this buffer space is crucial for the health of Bangalore. Just like urbanisation swallowed the Turahalli forest, our ESZ faces the same threat.
A big part of our community work is to engage people living in the ESZ in deeper, everyday conversations about the risks of the dominant development model to them and their unique space.This second Kai Thota is coming up in Ramanayakana Doddi, a Lambani settlement. The Lambanis are a semi-nomadic tribe—not traditionally farmers—but over the last 3–4 decades of settling here, they’ve started learning bits of agriculture from their Vokkaliga neighbours. Even now, much of the land lies fallow.
We’ve worked with the Ramanayakana Doddi community earlier—documenting their cultural practices and making jewellery with naturally dyed silk cocoons. Green manuring is just the beginning of our longer journey with them.Do spread the word about this meetup—it would be great to have more Bangaloreans understand the ESZ and the people who live in it. 😀
At the end of a farming cycle, it’s important to take a close look at how your farm performed—both in the field and in the pocket. Reviewing your crops, soil, water, and income helps your group spot what worked, catch issues early, and make better plans for the next season.
01. How Do You Keep Records on Your Farm?
Earlier, we saw how simple notes on germination, soil response, water flow, yield, and rainfall can guide better farming decisions. It’s worth repeating that consistent record keeping is one of the most powerful tools you have.
Why it matters now:
Your post-harvest review is only as strong as the notes you kept during the season. The records you made on germination, soil response, water flow, yield, and rainfall now become evidence you can use to:
Review Monthly Patterns – Check which beds kept doing well and which ones struggled. Example: If Bed A shows “Poor” soil response three months in a row → add compost or change the crop.
Compare Seasons – Spot differences between this year and last year’s harvest. Example: Example: Did more rain mean fewer seeds sprouted? Did compost increase yields?
Plan Resources Better – Use yield and soil notes to decide seed, compost, and labor needs for the next cycle. Example: If the irrigation system needs repairs, plan for the labor and time required to fix it before the next season.
Set Fair Prices – Rely on actual yield data to negotiate with confidence in the market.
Catch Problems Early – Notice repeated weak spots and plan solutions like crop rotation or bed resting. Example: If one bed keeps performing poorly, you can plan crop rotation or give the bed rest to recover.
Build Knowledge Over Time – Turn your notes into a farm history that guides smarter decisions each year.
Your records aren’t just notes — they are your farm’s history. The more carefully you keep and use them, the stronger your decisions will be every season.
02. How Do You Review Farm Finances?
At the end of a farming cycle, it’s important to see how your farm did—not just in crops, but also in money. Reviewing finances helps your group understand what worked, what didn’t, and plan better for the next cycle.
What Should You Record?
Income: Money received from CSA subscribers, Santhe sales, or other buyers.
Expenses: Seeds, compost, tools, water, transport, and labor costs.
Savings or Surplus: Money left over after all expenses—this can be saved for the next cycle or used for group needs.
How to Review Your Finances Together?
Bring your records: Have your notebook, receipts, or phone notes ready.
Check each item: Compare what you spent and what you earned.
Discuss as a group: Ask questions like:
Which crops gave more income?
Which costs were higher than expected?
How can we reduce waste or save money next time?
Decide together: Agree on how to use surplus money—buy tools, save for the next season, or support community needs.
💡 Tip
Keep it simple. Even small groups can track money in a notebook. The goal is understanding, not perfect bookkeeping.
A good harvest depends on what happens at every stage — from sowing seeds with care, to supporting plants as they grow, to harvesting at the right time. In this chapter, you’ll learn how each step can make your crops stronger and more productive.
01. How to Plan Your Crops?
Good crop planning helps you get the most from your land all year round. It is something you need to think about and plan for throughout the year, based on the changing needs of your market as well as the health of your soil and farm.
You need to plan your sowing and harvest cycles in a way that allows you to produce regularly without long breaks. You can do this in a number of ways:
A. Crop Rotation:
Think of planting crops with different growth cycles so you can harvest different beds at different times of the year. This helps the soil stay healthy, reduces pests, and gives you different crops at different times.
For example:
You can grow tomatoes in one bed.
At the same time, you can grow papaya or other greens in another.
After harvesting tomatoes, you can grow legumes like moong or chana in the same bed to add natural nitrogen to the soil.
Here’s why crop rotation is important:
It gives the soil a break — different crops take different nutrients, so the soil doesn’t get tired.
It controls pests — bugs that love one crop won’t find the next one so easily. It allows you to grow crops for different needs — home use, market sale, or improving soil.
It spreads your risk — if one crop fails, others can still grow.
Plan your beds in such a way that:
Different crops are ready at different times of the year (weekly or monthly harvests)
Crops that use fewer nutrients come after heavy-feeding crops
Tall crops (like papaya) don’t block sunlight from short ones (like coriander)
This way, your land stays active, your soil stays healthy, and your harvest keeps coming throughout the year.
B. Companion Planting:
You can also think of companion planting! Some plants grow better when they are planted next to certain other plants. This is called companion planting.It helps in two ways:
Some plants protect each other from pests (like insects).
Others help the soil by adding natural nutrients.
Farmers use a mix of:
Traditional knowledge (what elders have always done)
Permaculture ideas (working with nature)
And biodynamic methods (looking at plant energy and soil life)
This helps them decide which plants should share a bed and grow together as good companions — For example growing onions and carrots together can help prevent certain pests like root fly.
Companion Planting also allows you to save space and make the most of all the effort you are putting into maintaining your farm.
02. How To Sow Your Seeds for a Healthy Harvest?
Sowing seeds the right way is very important, especially for root vegetables like carrots, beetroot, and radish. If seeds are sown too close together, the plants do not get enough space to grow. This means:
The roots stay small
The plants compete for sunlight and air
The final harvest is poor
But don’t worry — with a few simple steps, you can sow better and get a healthier crop!
What Are Some Easy Ways to Sow Your Seeds?
Use Simple Tools-
For small seeds like carrots, it is hard to sow them evenly by hand.You can use PVC pipe seders or other basic tools to help drop one seed at a time. This saves seeds and avoids overcrowding.
Maintain the right spacing – Each plant needs sunlight, air, and space to grow properly. Too many seeds in one place means crowded plants, which in turn means a weak harvest.
You could use a simple homemade device like a spacing stick or twig marked with distances to help you plant with correct gaps. Here are a few examples:
Carrot: Keep about 5–7 cm gap between each seed
Brinjal (eggplant): Needs at least 12 cm between each plant
Tomato: A bushy plant, needs more space — around 45–60 cm
Chilli: A tall plant, can be sown closer — about 20–30 cm apart
In order: Spacing Stick, Sowing Board and PVC Pipe Spacer
💡 Tip
For large areas, use sowing boards or string lines to maintain rows neatly and save time!
03. How Do You Support Plants During Growth?
Once your plants start growing, your main job is to support their healthy growth and protect the soil. This phase is all about making sure your crops are not crowded, dry, or disturbed by weeds or pests.
Here are three key things to take care of during the growth phase:
Support and Trimming– Helping Plants Stand Tall
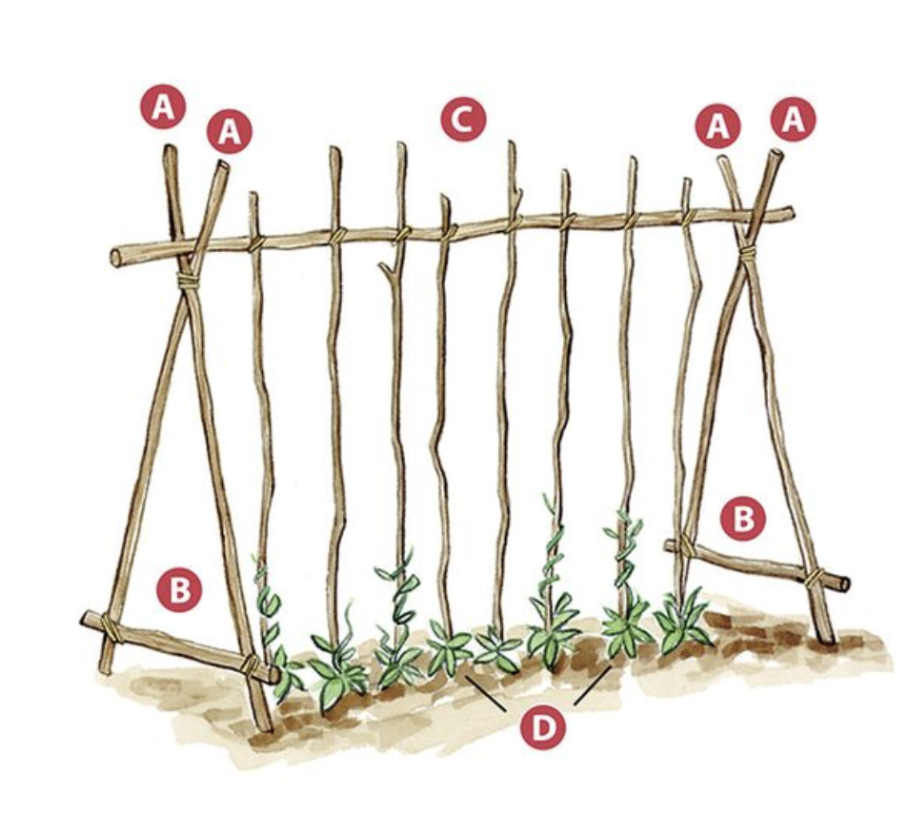
Support Systems – Some crops like tomato, chilli, and beans are climbers or creepers. These plants need support to grow straight and strong. You can use:
Bamboo sticks to hold up the main stem
Jute ropes tied to nearby poles or trees
Trellises (a wooden or bamboo frame) for plants to climb on
A-Frame Trellis
T-Frame Trellis
Trimming– Cut off extra leaves and side branches to help the plant focus its energy on growing fruits. This makes the plant healthier and improves yield.
Trimming or Pruning of Leaves
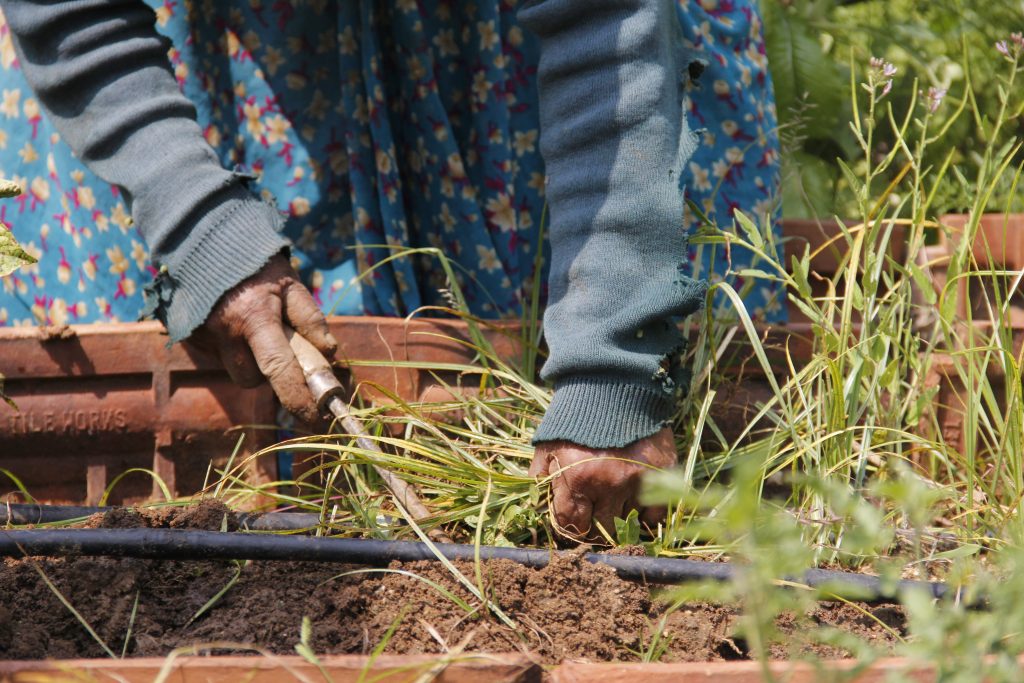
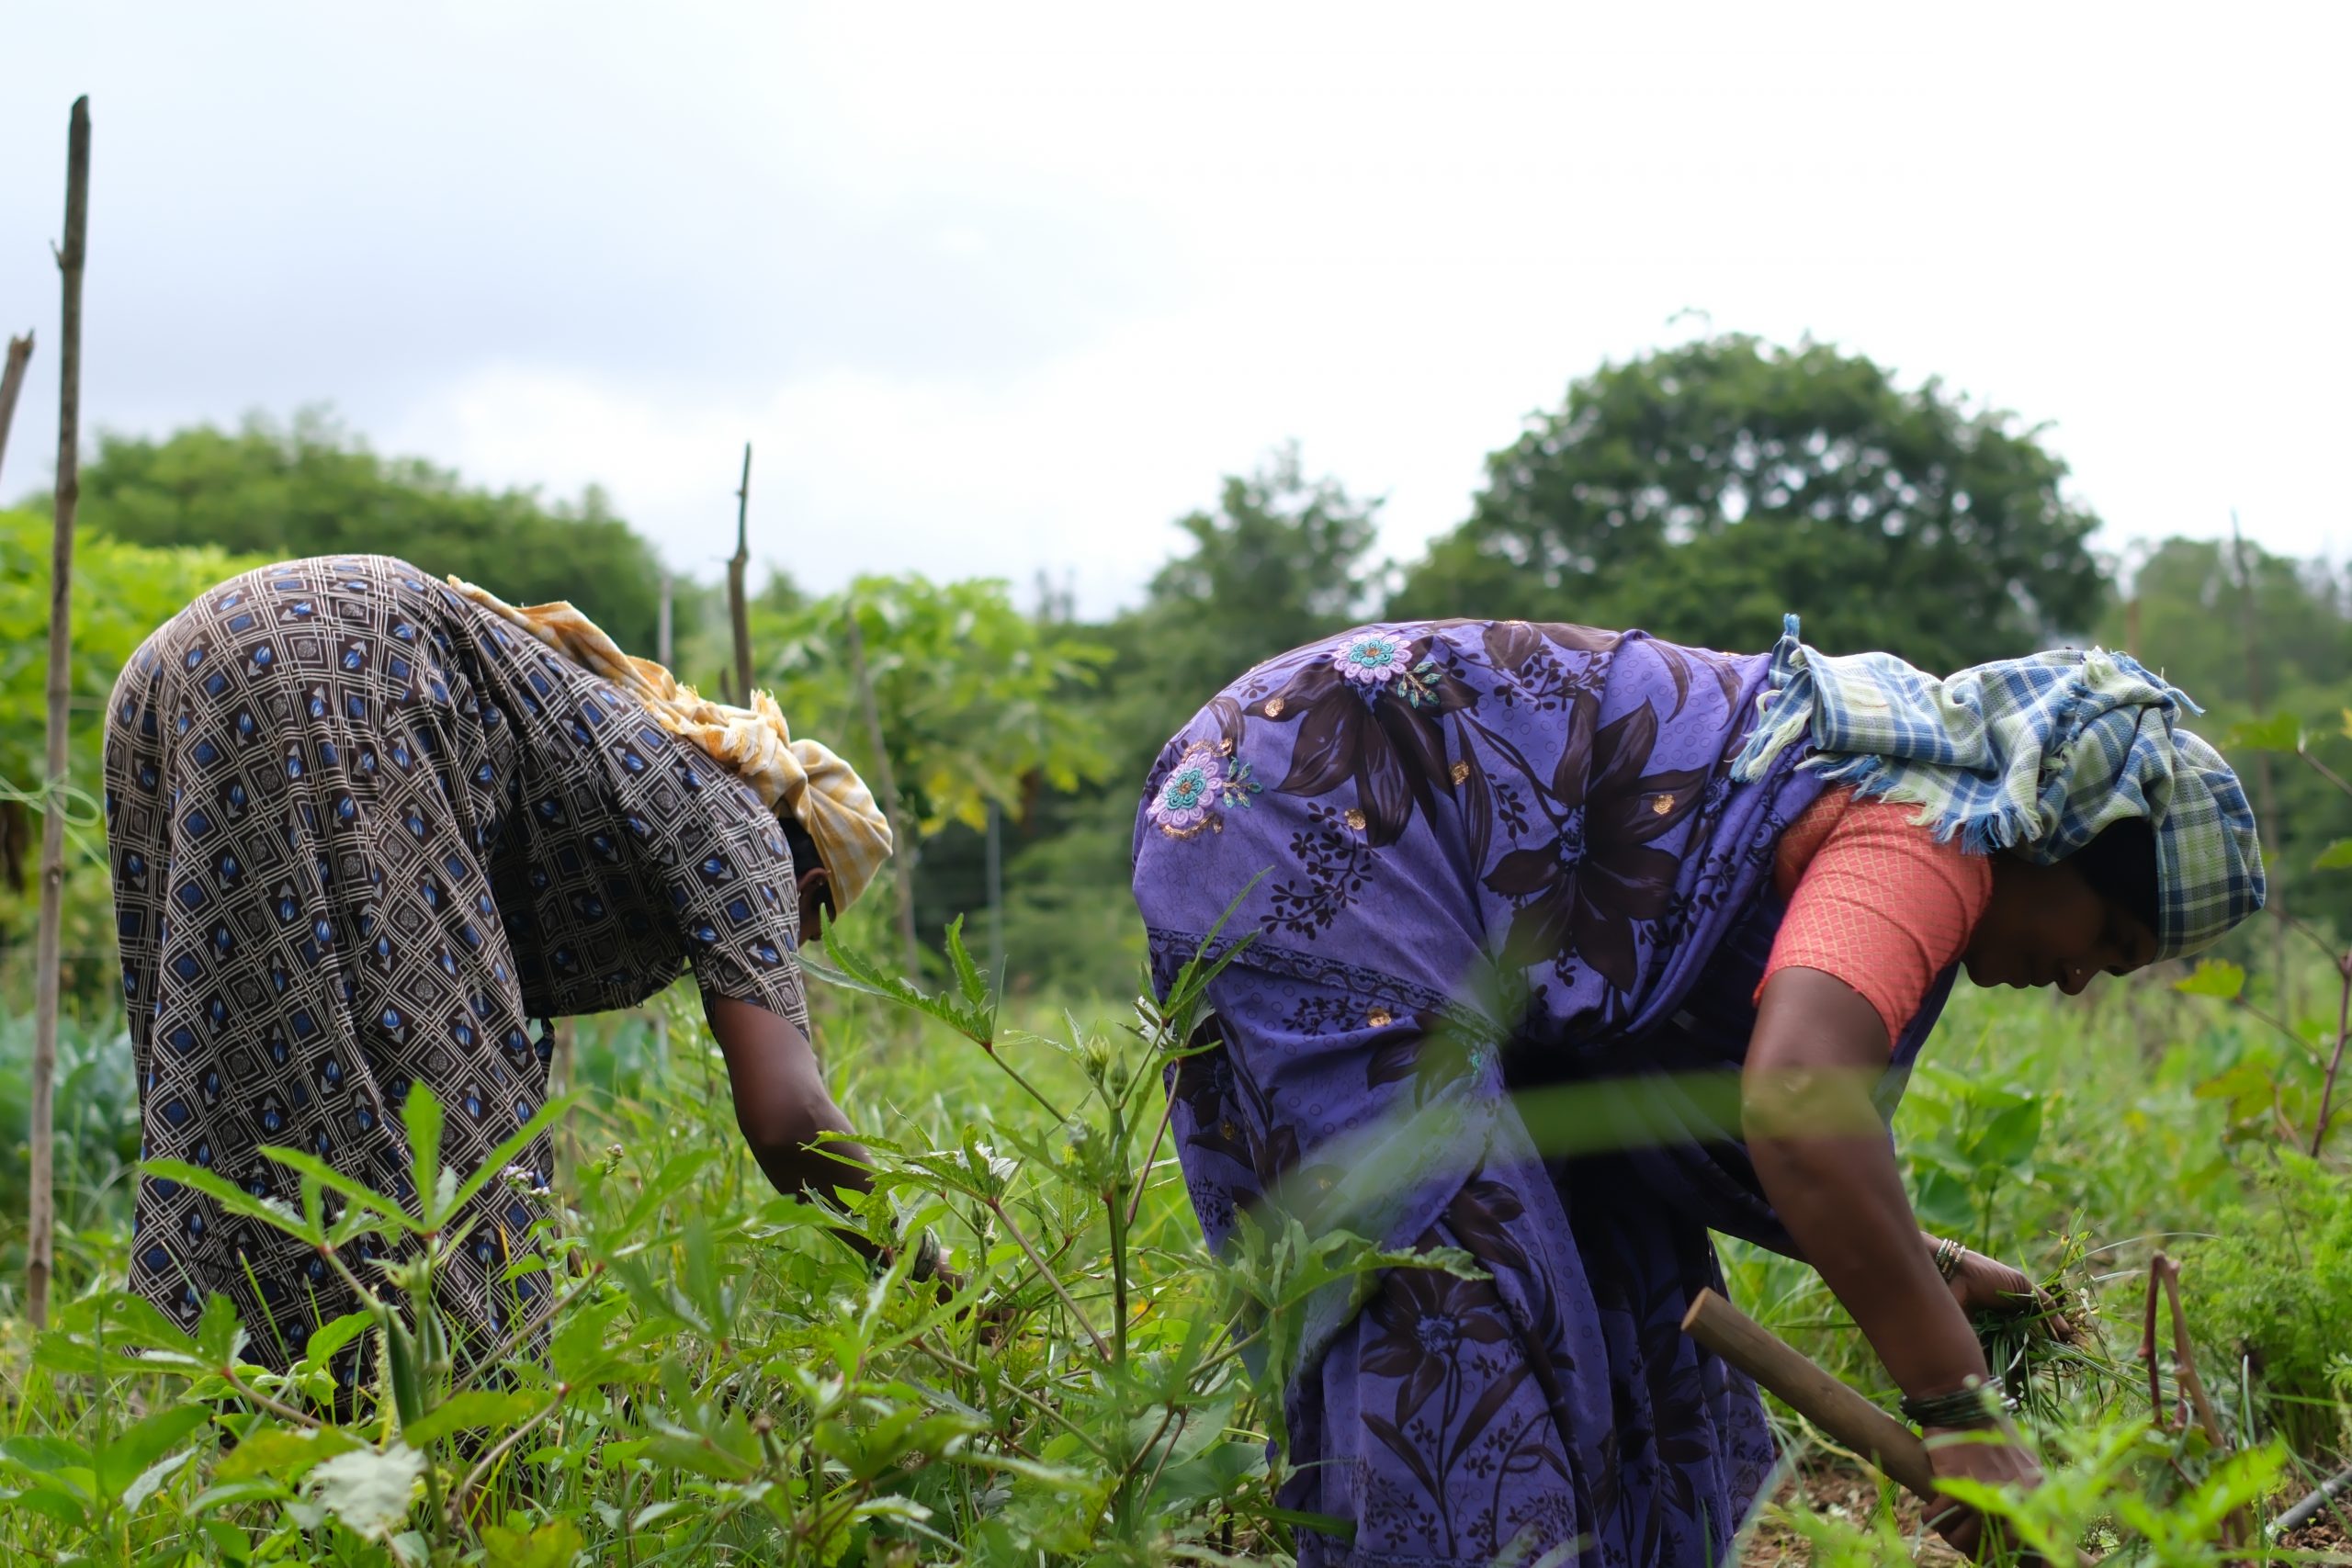
Weed Management – Turning Weeds into Food
Weeds are plants that grow where you don’t want them — in between your crops, near the beds, or along the borders. If not removed in time, weeds can:
Take away water, sunlight, and nutrients from your crops
Make the farm look untidy and harder to manage
Attract pests and insects
That’s why it’s important to regularly remove weeds and to assign members to do the same.
However, not all weeds are bad. Some soft green weeds can be reused to make fermented weed tea, a homemade liquid manure and pour it near the plant roots or mix it into drip irrigation. This feeds the plants and avoids wasting weeds.
👉🏾 Fermented Tea Recipe can be found in the Resource section.
“We separate the weeds, ferment them, and give them back to the soil. They feed on the next cycle.” ____ Geetha
Mulching – Protecting the Soil from Heat and Dryness
Mulching is a great way to improve soil fertility and protect it over time. It helps the soil stay moist, cool, and full of nutrients—especially during hot weather, when the sun dries out the land quickly.
We recommend trying mulching during the hot summer months, like April and May, when protecting your soil is most important.
👉🏾 You can find out more about the process by following the recipe card in the resource section or in the next post
04. How Do You Harvest at the Right Time?
Harvesting doesn’t just mean picking vegetables. It means picking them at the right time and in the right way.
Here’s what to look for:
Match Your Harvest with Demand – Think about who you are harvesting for:
Is it for your family or community?
Is it for weekly markets or a group of subscribers? If your market picks up vegetables every Friday, plan your harvest accordingly.
“Harvest planning should match your needs. If your demand is weekly, your harvest should be weekly too.” ____ Vishala
Crop Cycle – Every crop takes a certain number of days to grow and ripen. Keep track of planting days so you know when to check for harvest. For example:
Some leafy greens are ready in 30 days
Tomatoes may take 60–70 days
Size and Colour: You can follow harvest charts to assess your crops better.
Don’t Waste – Compost the Rest: If a vegetable is overripe or damaged— don’t throw it away! You can:
Add it to your compost pit
Use it to make fermented liquid manure for the soil
👉🏾You can find out more about the process by following the recipe card in the resource section or in the next chapter
Even after you’ve sown your seeds, the work isn’t done. This is the time when your soil needs the most care and attention. Healthy soil helps your plants grow strong roots, produce better harvests, and resist disease and stress.
Here’s how you can nurture your soil while your crops are growing and continue caring for it even after harvest-
1.How to Manage Your Soil As You are Producing?
Even after you sow your seeds, your job isn’t over. In fact, this is the time your soil needs the most care and love. Healthy soil gives you strong roots, better harvests, and crops that can fight off disease and stress.
Here’s how you can take care of your soil while your plants are growing. You can use a mix of:
Solid inputs like compost and manure.
Liquid inputs like Jeevamrutham or Gau Kripa Amrutham.
Solid Inputs
Solid inputs are things you mix into the soil. They break down slowly and feed the soil over time. This helps plants grow better without using chemical fertilizers.
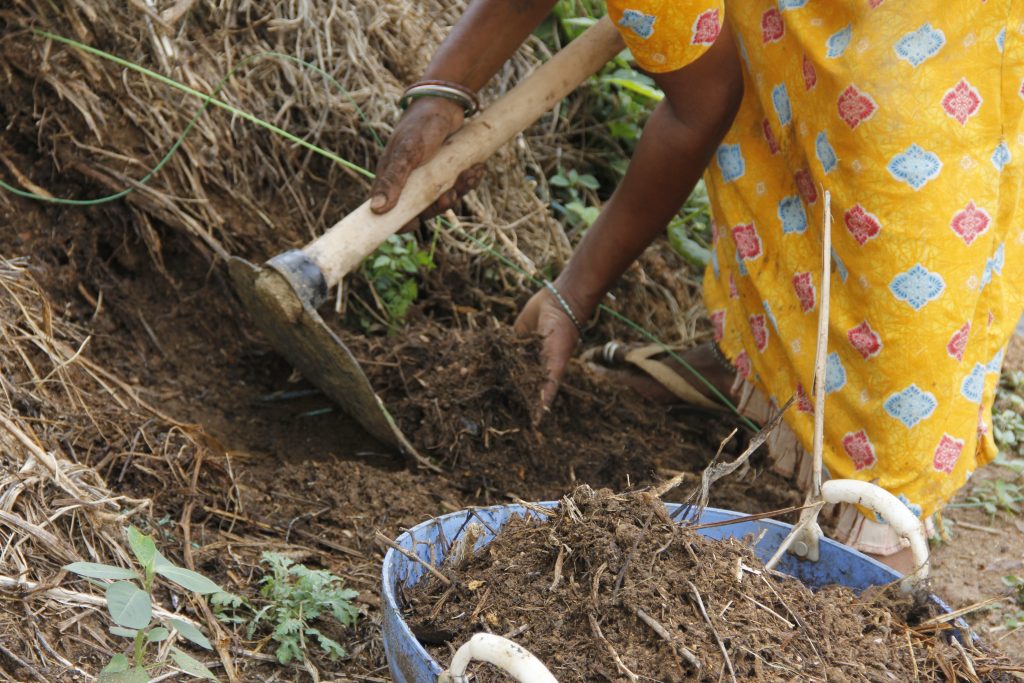
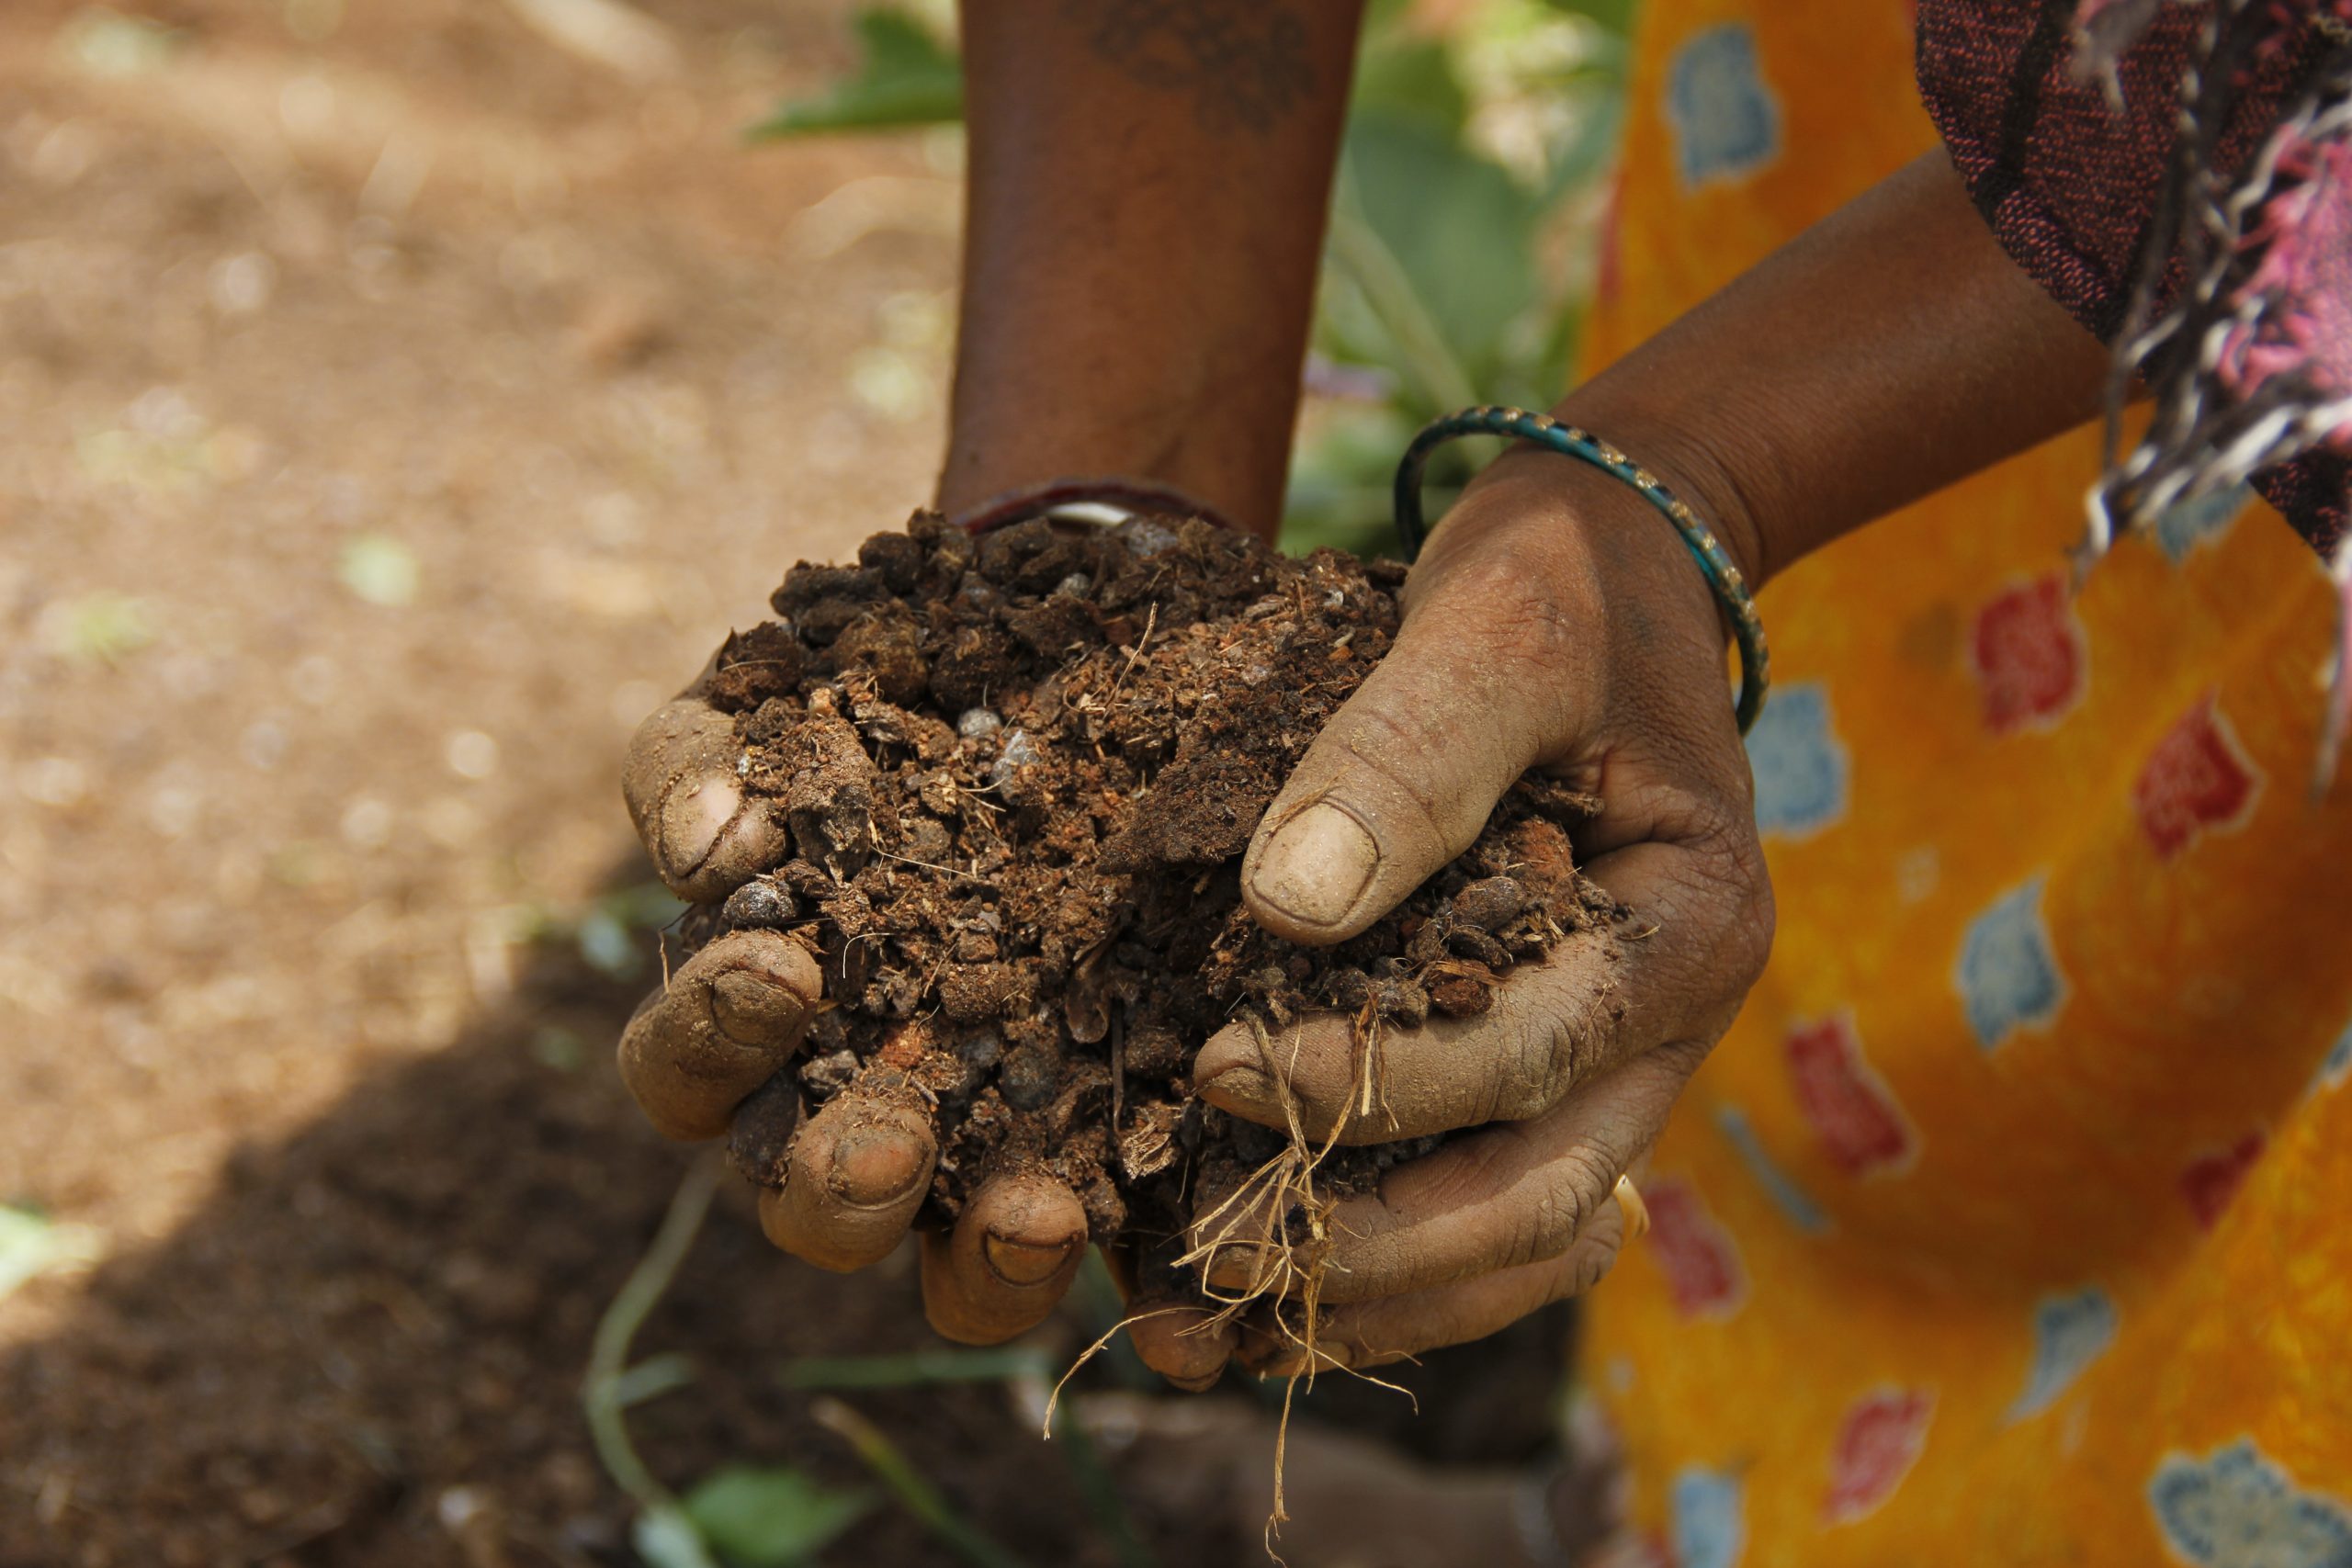
1. Farmyard Manure This is the traditional mix of cow, goat, or sheep dung that has been allowed to decompose completely.
You can collect it from your farm or from your neighbors.
It’s full of good microbes that keep the soil alive.
When added to the soil, it helps roots grow strong and steady.
💡 Tip
Use only fully decomposed dung, not fresh one. Fresh dung can harm young plants.
2. Compost Compost is a natural fertilizer made at farm using:
Kitchen waste (peels, leftover food, fish waste).
Cow dung.
Dry leaves, straw, and crop residue.
You can prepare it using:
Pit method: Dig a shallow pit about 2–3 feet deep. Layer wet items like vegetable peels or dung (greens) and dry items like dried leaves or stems (browns) one after the other. Keep the pile moist and cover it with dry grass or a jute sack to protect it from excess rain or sun.
Heap method: Pile up the greens and browns directly on the ground in layers. Make the heap about 3–4 feet high. Cover and turn it every 10–15 days.
This compost helps by:
Feeding the soil.
Keeping it moist.
Adding life to it.
Saving money on fertilizers.
💡 Tip
Use a 2:1 ratio of greens (wet items like vegetable peels or dung) to browns (dry items like dry leaves or straw). Keep it moist and turn it every 10–15 days. In 2–3 months, you’ll get rich, earthy compost.
3. Enriched Biochar
Biochar is like charcoal, but made specially for soil. To make it:
Burn dry leaves, crop waste, or branches in a closed drum without too much air
📹 Watch this video on how to make biochar
To make it even better:
Soak biochar in Jeevamrutham or Panchagavya. These are natural tonics made using cow-based ingredients that bring life to your soil.
👉🏽 Don’t worry if these names are new to you! You will get to know more about how to prepare and use Panchagavya and Jeevamrutham soon
This fills it with friendly microbes.
Biochar helps by:
Holding water and nutrients like a sponge.
Making space for microbes to grow.
Staying in the soil for years without breaking down
Liquid Inputs
Just like how we feel refreshed with a cool drink, plants also need to be refreshed with extra nutrition sometimes. That’s where liquid inputs help. They act faster than compost or manure. They can be sprayed on leaves, poured near roots, or mixed into drip irrigation. These natural tonics are easy to make using things like cow dung, urine, jaggery, buttermilk, or local herbs.
When you ferment these, they become natural tonics that:
Feed the soil
Boost plant immunity
Keep away pests and diseases
Let’s look at the most common ones:
1. Gau Kripa Amrutham
Gau Kripa Amrutham is not just a liquid. It’s full of good bacteria that live in the soil and help plants grow strong.
Recipe (for 200 litres):
1 drum (200L) filled with 180-200 liters of water
2 litres of buttermilk (from native cow)
2 kg of jaggery (nattu sarkkarai)
Panchagavya: A natural mix made from five things that come from cows: dung, urine, milk, curd, and ghee
Local herbs: used in Ayurveda
How to prepare:
Mix all in a drum
Stir morning and evening for 5–7 days
Keep in a shaded place, away from direct sunlight, by covering it with a jute sack
Usage:
Mix with water and spray on the leaves, preferably in the morning (called foliar spray)
Pour near the roots (called soil drenching). And it’s preferred to be done in the evening
Add it to the drip line and make sure that you filter it well beforehand (called fertigation)
What does it do?
Helps plants absorb nutrients better
Makes them stronger against disease
Makes the soil soft, airy, and full of life
Helps rainwater soak into the ground
Encourages bees, earthworms, and other helpful creatures to come back
💡 Tip
There’s no limit to reuse. This can be reused again and again.This works best with native cow dung and urine. Avoid using buffalo or foreign breeds. If not available, get from a nearby Gaushala. Try first on a small patch before large-scale use.
2. Jeevamrutham
Have you heard the saying, “The soil also needs food”? Jeevamrutham is that food. It brings life back to tired soil and helps crops grow stronger.
Recipe (for 200 litres):
10 kg fresh cow dung (From native cow)
7 litres cow urine
2 kg jaggery (nattu sarkkarai)
2 kg cereal flour (like besan or millet flour)
A handful of fertile soil (best from under a banyan tree)
180–200 litres clean water
How to prepare:
Mix all in a drum
Stir morning and evening for 5–7 days
Keep in a shaded place, away from direct sunlight by covering it with a jute sack
When it has a slightly sweet and sour smell, it’s ready! It will take 5 to 7 days.
Usage:
Soil drenching (pouring it at the plant base – evening preferred)
Foliar spray (diluted – early morning)
Fertigation (after filtering)
Seed soaking before sowing
💡 Tip
How to stir it? There’s no fixed rule. Some farmers prefer clockwise, some anti-clockwise, and others switch between the two. The important thing is to stir well!Foliar sprays are best done in morning and ground applications (like drenching), preferably in evening.
Why do farmers love it?
Easy to make, low cost
Brings back earthworms
Loosens soil and adds fertility
Helps crops taste better and use less water
Works for all kinds of crops such as veggies, grains, pulses, or trees
Jeevamrutham smells so good to earthworms, they travel up from 10 feet underground! They create tiny tunnels that keep the soil soft and full of air. Their waste also adds richness to the soil, helping it become more fertile and full of life.
3. Bio Enzymes
Have you ever thought that even fruit peels can feed your soil? That’s what bio-enzymes do! They turn kitchen waste into powerful natural fertilizer for your crops.
Bio-enzymes are full of good microbes that help soil breathe, boost plant growth, and keep pests away all without any chemicals. It’s one of the easiest and most affordable ways to care for your land naturally.
📹 Watch this video on how to make Bio Enzymes
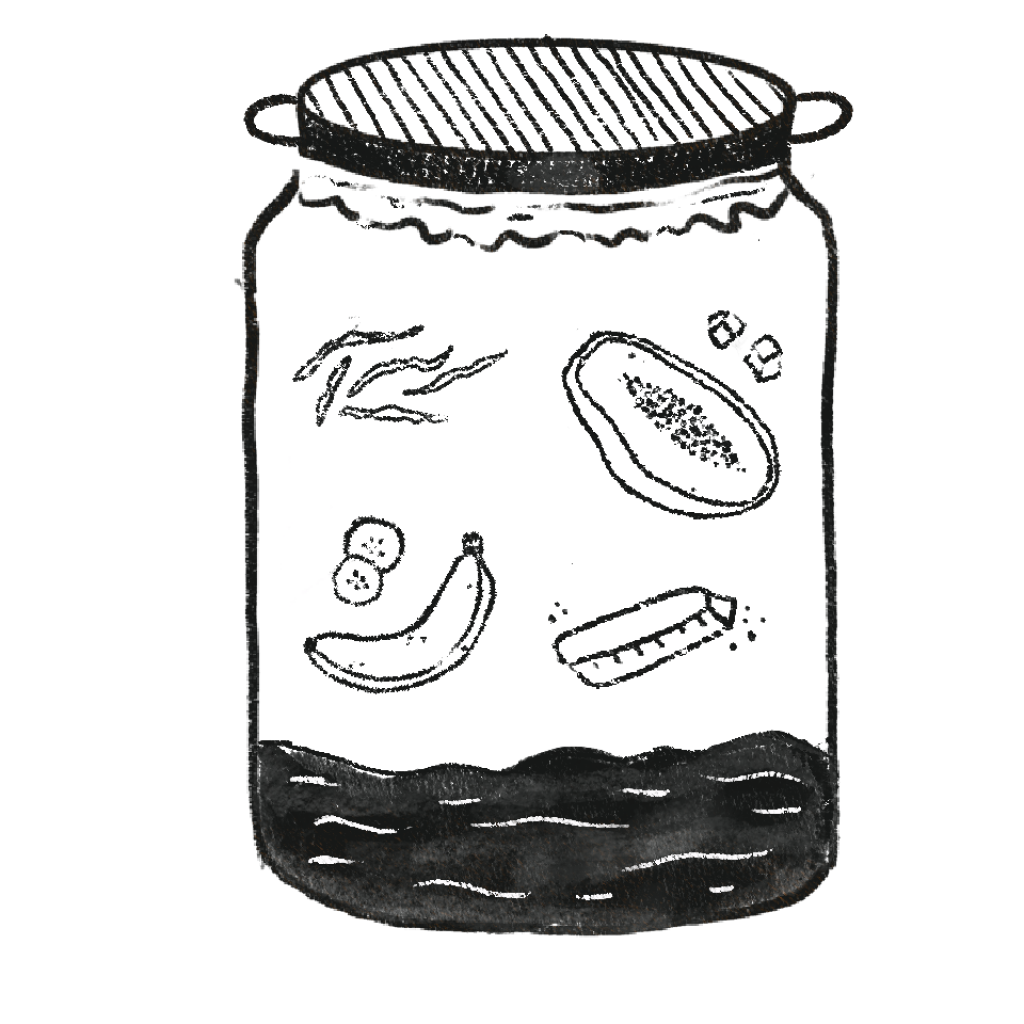
Recipe (for 10 litres):
3 kg fruit peels (any mix of citrus, banana, papaya, or vegetable scraps)
1 kg jaggery
10 litres clean water
How to prepare:
Mix all three ingredients in a clean plastic drum or container.
Leave some space at the top — fermentation produces gas!
Cover the container loosely, or seal it with plastic wrap that has a few small holes to let gases escape. (If using a tight lid, open it slightly every few days to release pressure.)
Stir the mixture once every 2–3 days for the first month.
Keep the container in a shaded, cool place for about 3 months.
Once fermentation is complete, the liquid will have a pleasant fruity smell — that’s your bio-enzyme!
Strain and store it in clean bottles, sealed tightly for use.
Usage:
Soil drenching: Mix 1 litre of bio-enzyme with 20 litres of water and pour near plant roots.
Foliar spray: Mix 1 litre with 30 litres of water and spray early in the morning.
Drip irrigation: Filter well and add to the drip system once in 10–15 days to improve soil health.
💡 Tip
The leftover fruit pulp can be added to compost or used again to make a fresh batch, nothing goes to waste!
Why do farmers love it?
Made from simple kitchen and farm waste
Improves soil health and plant immunity
Keeps pests away naturally
Gives crops better taste and colour
100% eco-friendly and chemical-free
2. How Can You Keep Pests Away from Your Crops?
In organic farming, pest control is not about killing insects with strong chemicals. It’s about protecting your crops in a safe, natural way. Pest control is to be done as part of regular farm care, not just when there’s a problem.
Instead of buying chemical sprays, you can prepare homemade pest control liquids using leaves, cow dung, animal waste, and fermented mixtures.
i. Dashaparani (also called Dashakavya or Dashakavyam)
Dashaparani means “ten leaves.” It’s a traditional and powerful pest repellent made by fermenting 10 types of plants. These leaves are usually bitter, strong-smelling, or known to repel insects. It’s easy to make and widely used in organic farming.
📹 Click to watch this video on Dashaparani
How to Prepare Dashaparani:
Ingredients:
10 types of leaves (choose local bitter or strong-scented leaves): Neem, Pongamia (honge), Datura (ummatte), Calotropis (ekka), Papaya, Custard apple, Castor, Guava, and Tulsi (or any locally available leaves known to repel pests)
Cow dung – 5 kg
Cow urine – 10 liters
Water – 30 liters
Jaggery – 500 grams (to help fermentation)
Turmeric powder
Crushed Ginger, Garlic and Green Chilli
Steps:
Separate the leaves from the stem.
Put them in a barrel or drum with an open top.
Add cow dung, cow urine, jaggery, and water.
Add Panchakavya
Add Crushed Ginger, Garlic and Green Chilli
Mix well using a stick.
Keep the drum in a shaded area and stir once a day (10–15 times, clockwise or anticlockwise).
Let it ferment for 10–15 days.
After fermentation, the liquid will have a strong smell and turn dark. This is your Dashaparani Ark.
How to Use:
Filter the liquid using a cloth.
Mix 5 liters of Dashaparani with 100 liters of water.
Spray it on crops early morning or late evening.
Use once every 7–10 days or after rains.
💡 Tip
You can also apply it to the soil at the base of the plant to keep pests in check from the root.
In the Kai Thota model, farming is a year-round effort — there’s no pause after the harvest. As soon as one crop is gathered, the group is already preparing for the next: enriching the soil, selecting the next set of crops, and planning the next cycle.
This approach requires continuous and flexible planning. It’s not just about choosing what to grow, but also about working together to make smart decisions at every stage —land preparation, planting, pest protection, harvesting, and getting ready for the next round.
Every step requires care and coordination. Success comes from thinking ahead, staying adaptable, and caring for the land throughout the year.
01. What Should You Think About While Planning?
Here are some key things we think about while planning:
💰 What crops are in demand in the market?
🧑🌾 Who will do what work in the group?
🌱 Which crop should grow where, when, and how?
🌞 Which season is best for which crop?
🌿 Is the soil healthy and ready?
🐛 What pests or diseases might affect this crop?
🔁 And how to prepare the farm for the next cycle? (sustaining the farm)
By keeping these points in mind, the group can stay ready for challenges and make sure crops grow well, land stays fertile, and income is shared fairly.
How Do We Share Work Fairly?
Before starting any work on the farm, it’s important to sit down as a group and plan who will do what. This helps avoid confusion, saves time, and makes sure everyone is working together smoothly.
When assigning roles, think about:
What needs to be done first and what is most urgent
Who is available, and at what times
What each person is good at or comfortable doing
Farming has many small and big tasks. Here are some roles you can assign based on the type of work:
🌱 Sowing – preparing the land, planting seeds carefully, watering early crops
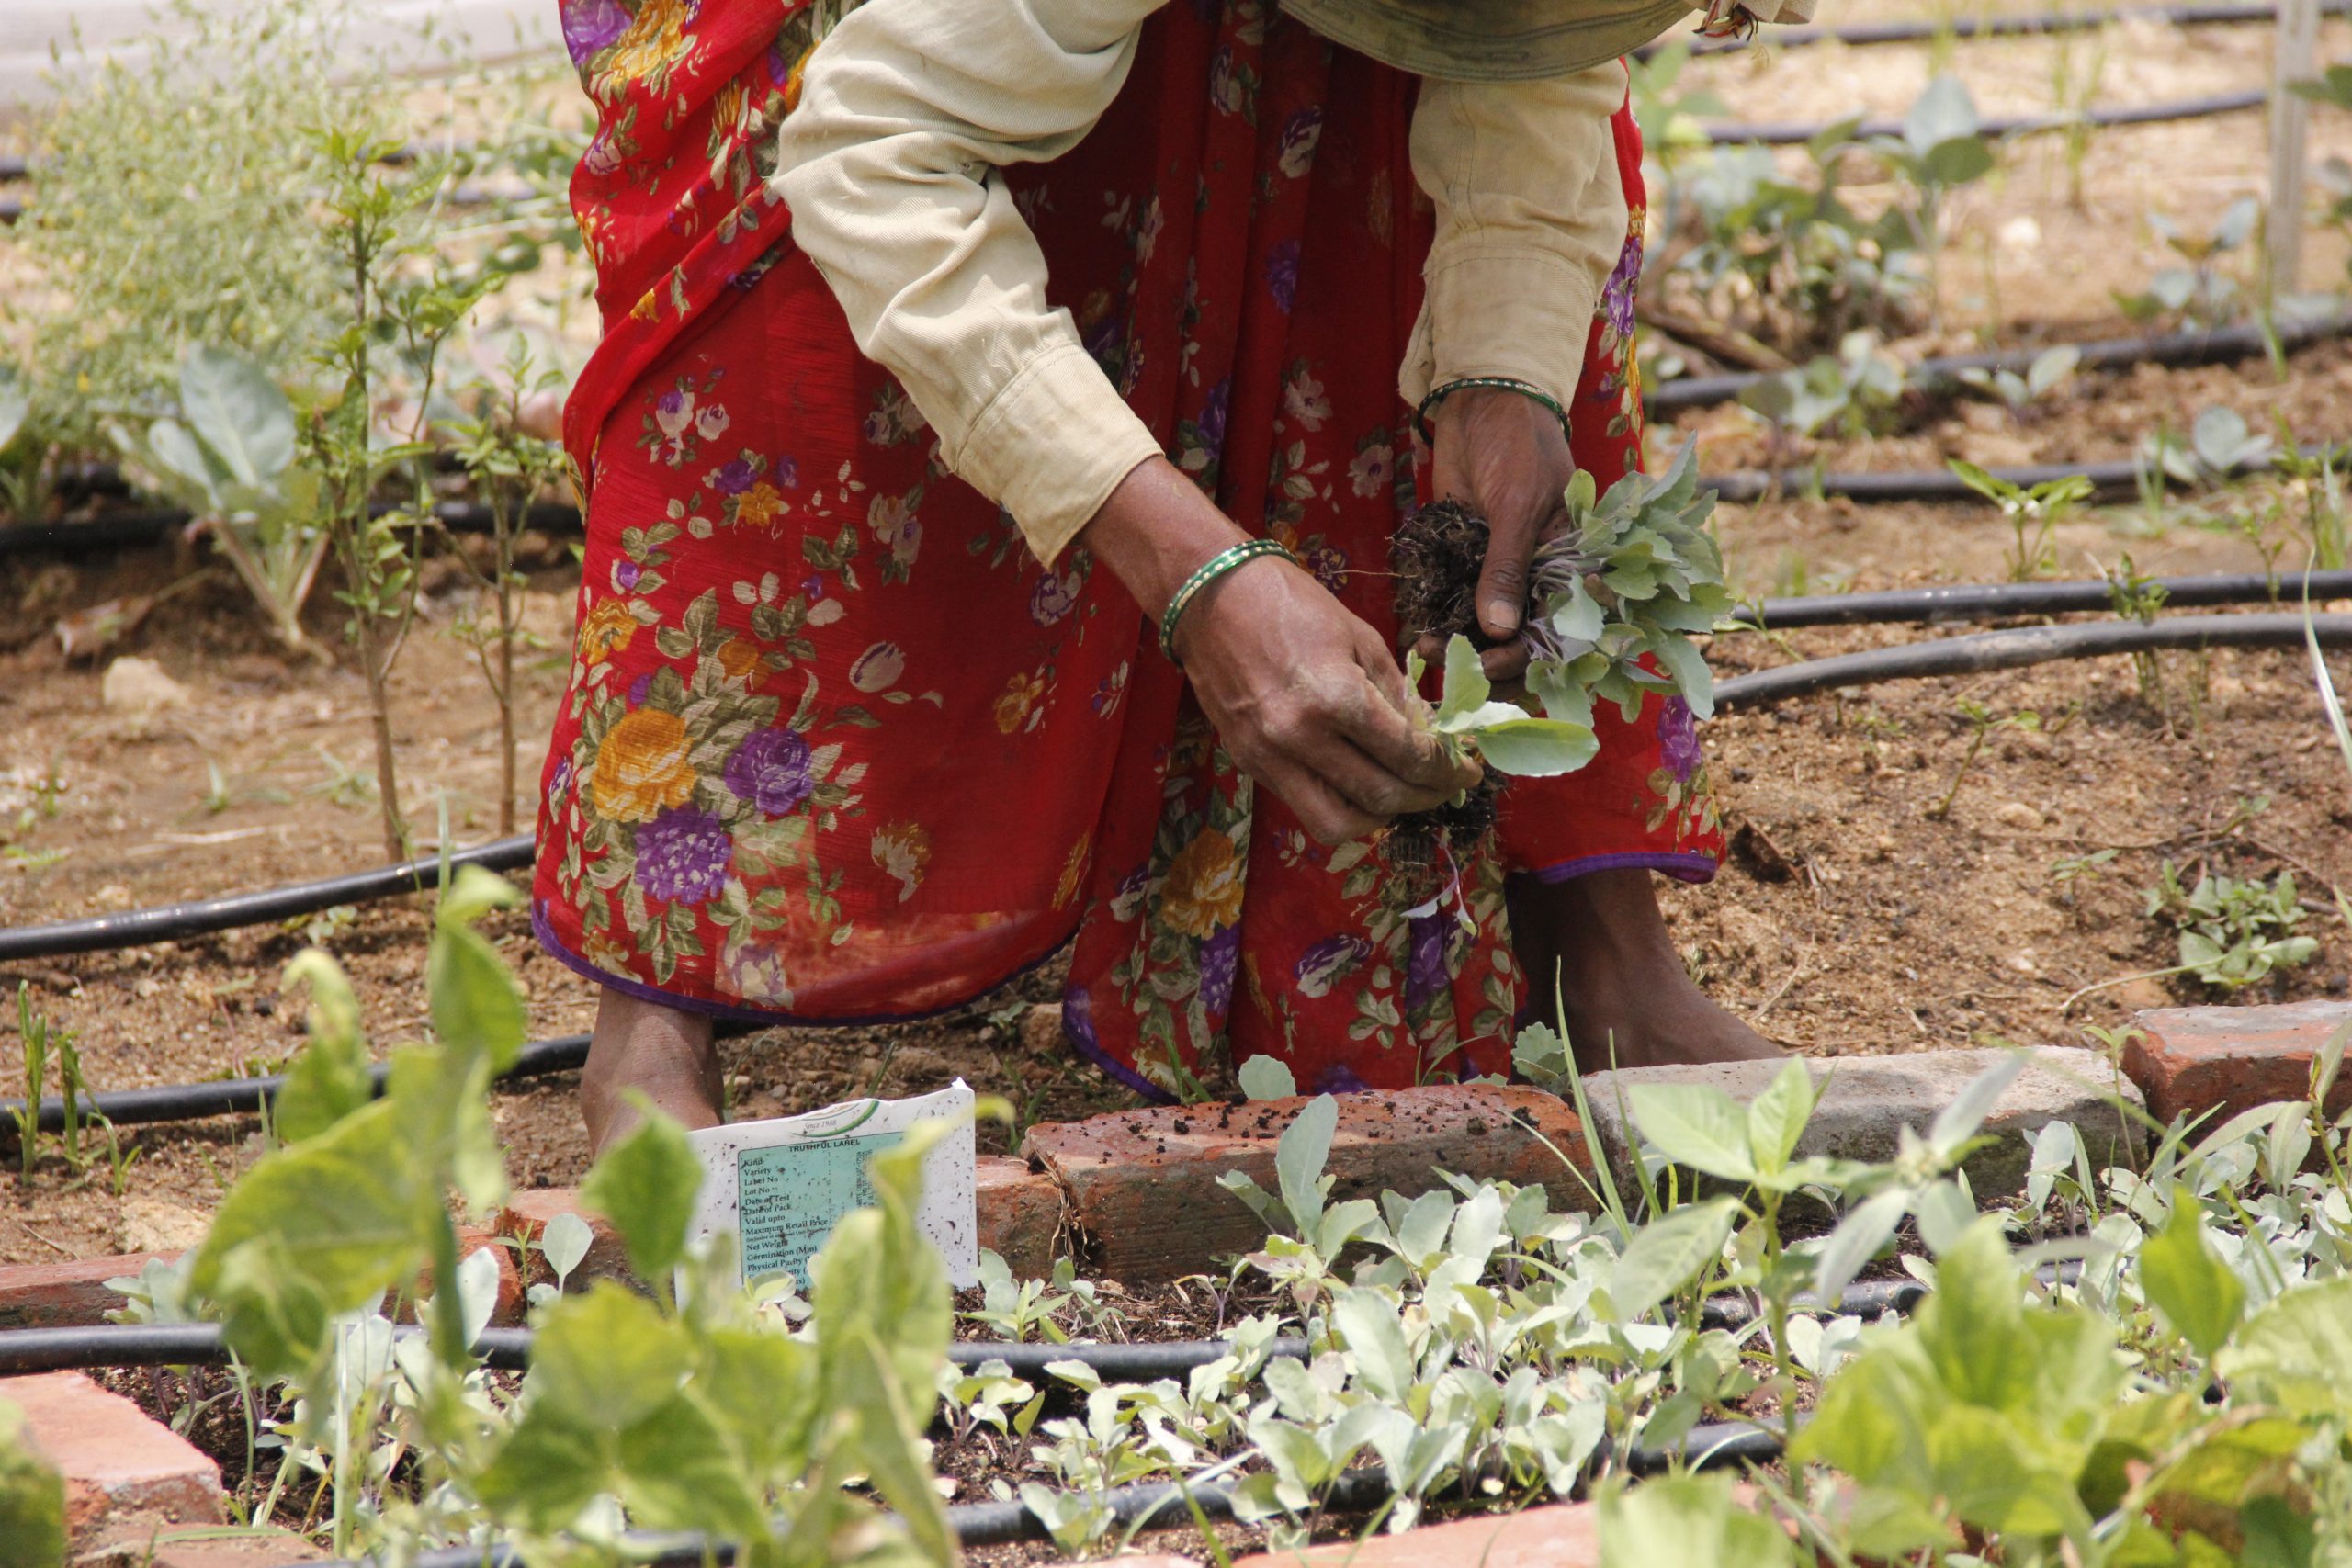
🪴 Nursery care – looking after seedlings, checking moisture, protecting young plants
🛻 Distribution and delivery – packing the harvest, organising transport.
You can also think about planning and assigning seasonal and cycle-based roles. For example, some groups also plan roles using local calendars, festivals, or moon cycles, so tasks align with nature’s rhythms.
💡 Tip
Make a simple task chart for your team
Divide tasks into: 🔁 Regular tasks – daily or weekly tasks: like watering, weeding, record-keeping
⭐ Special tasks – once in a while tasks: like preparing new beds
Put the chart in a place where everyone can see it – like near the storage shed or meeting spot.
Having a clear role plan builds trust, reduces mistakes, and makes the work feel shared and fair.
👉 Check out the resources for a quick and simple template
02. How Do Records Help You Plan Better?
Record keeping is a simple but powerful way to make farming decisions and help keep your farm on track to ensure success
Why keep records?
To understand what helps your crops grow well
To catch problems early (like poor water flow or bad seeds)
To plan better for the next season
To set the right prices in the market
To make better income over time
What should you record?
Germination rate – How many seeds actually sprouted? 👉🏾 Count seeds planted vs. seedlings that sprouted. Ex: 10 planted, 7 sprouted in tray 👉🏾 Or Give each bed a name/number. After germination note “Good” “Average” or “Poor”
Soil response – Which crop grew well in which bed? 👉🏾 Give each bed a name/number. After harvest, note “Good,” “Average,” or “Poor” plant growth. Ex: Bed A: Average, Bed B: Good
Drip irrigation – Is the water flowing well? Any blocks or leaks? 👉🏾 Walk along pipes. Note any leak, block, or no flow next to the pipe or valve number. Ex: Leak in bed 2
Yield tracking – How much harvest came from each bed? 👉🏾 Weigh harvested produce from each bed. Write date, bed name, and weighin kg. Ex: 5 July, Bed A, 12 kg
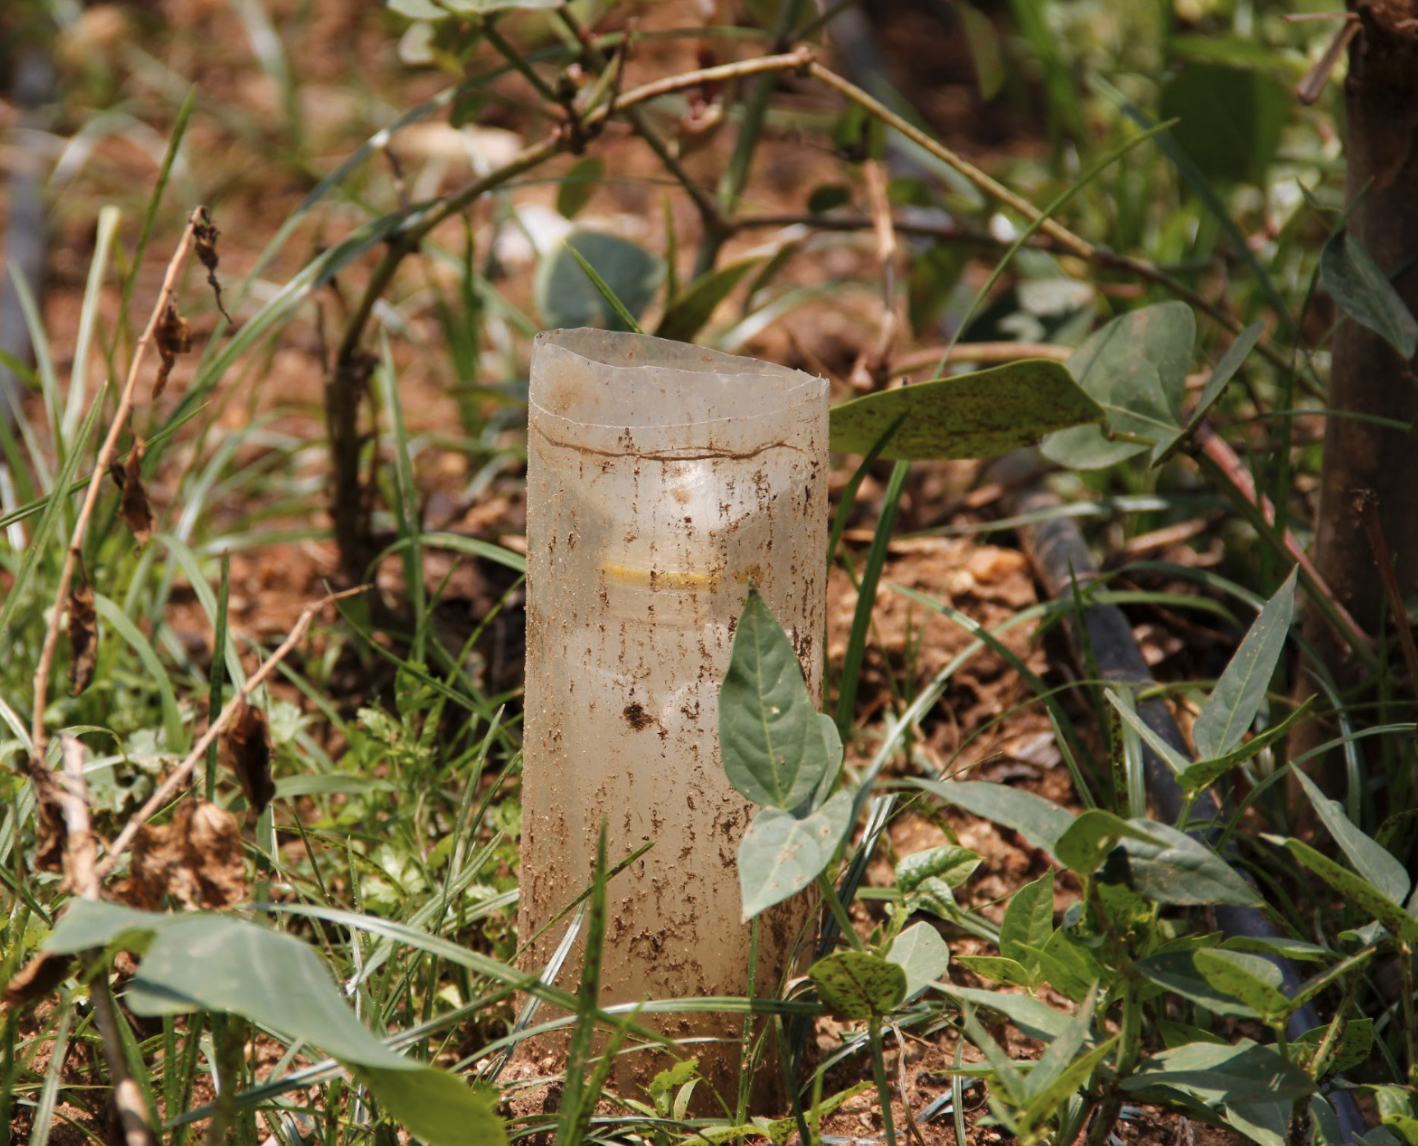
Rainfall– How much rain did your farm get? 👉🏾 Cut the top off a plastic bottle to create a funnel and place it into the bottom half. Mark 1 cm increments on the side of the lower half, leave it outside, and read the water level to measure rainfall.
How to Use Your Records?
Review Monthly: Look back at your notes to see trends (e.g., which beds need more compost).
Compare Seasons: Check last year’s data to plan better this year.
Plan Your Resources: Use yield and soil records to decide on seeds, compost, and labor needs for the next crop cycle.
03. How Do We Manage Money as a Collective?
To keep your Kai Thota collective strong, you need to plan how much money is coming in, how much is going out, and how to set a fair price for what you grow.
It doesn’t matter whether you’re selling through CSA, at the santhe, or both. What matters is knowing your basic costs, valuing your time spent in daily activities , and making sure everyone in the group earns a fair share.
Step 1: Know Your Costs
Split your expenses into two parts:
A. One-Time Setup Costs: These are things you buy once at the beginning:
Item
Approx. Cost
Seeds
Based on the season or ⭐ Collect seeds from local households or find nearest seed banks to source local/heirloom seeds
Tools (weeders, cutters, seeders)
₹2,000–₹3,000 per Kai Thota
Composting setup (drums, bins)
₹500–₹1,000
Water pipes or basic irrigation
₹1,000–₹1,500
Shelter, fencing, shade net (if needed)
Can vary – check MGNREGA support
💡 Tip
Use government schemes and subsidies like MGNREGA or NRLM to cover fencing, water pits or tool support where possible.
B. Monthly Running Costs: These are ongoing costs that happen every month or season:
Expense
Notes
Liquid inputs (like Jeevamrutha/ Compost/Manure/Bio Enzymes/Liquid Manures/Specialised Sprays or Inoculants)
Made regularly on-site
Seeds and saplingsTrellis materials
Depends on the season and plan
Transport to drop-off or market
Shared auto or vehicle
Bags and packaging
Use cloth or reused paper bags
Small tool repairs
Sharpening, oil, minor fixes
Labour/Salaries
Based on time and skills contributed by the group members
💡Tip
Use government schemes and subsidies like MGNREGA or NRLM to cover fencing, water pits, or tool support where possible.
Step 2: Share Costs and Income Fairly
For the first 2–3 months, your group will mostly be investing—setting up the farm, preparing beds, buying inputs, and sowing seeds. This phase takes time and money, but it’s the foundation for what comes next.
After this, once your crops begin to grow and you start harvesting, you’ll also start earning.
The Kai Thota collective uses a time-based model to share income—something your group can adopt too.
Everyone logs the hours they work in a notebook
Income at the end of the month is divided based on hours worked
If income is low, the group may save it or share smaller amounts until it builds up or speak to subscribers or local government for more support.
This means that:
Everyone’s time is valued, whether you are sowing, weeding, or harvesting.
Even if someone works only 10 days a month (due to their own land work, or work at), they are still paid for the time they contribute
💡 Tip
Some groups also set a minimum earning goal per member (₹2,000–₹3,000/month) and plan backwards from there.
📌 Example Calculation:
– 10 subscribers paying ₹500/month = ₹5,000 total – Expenses (transport, inputs): ₹2,000 – Remaining ₹3,000 shared between 3 members = ₹1,000 each – Add subscribers, adjust pricing, or reduce costs to grow income over time
Step 3: Review, Adjust, Repeat
Once you’ve completed a season of farming, pause and reflect:
How did each bed perform?
What was the quality of each produce?
What was your total yield vs. expectation?
Did your pricing match your effort? Were prices fair?
Did you spend more or less than planned?
Based on this, adjust crop choices, pricing, or delivery. Keep discussions transparent with group members and subscribers.
Remember “Start Small, Grow Steady” : You don’t need big systems or spreadsheets. What matters is:
Healthy soil is the foundation of everything we grow. Beneath the surface lies a network of microbes, roots, minerals, and organic matter, all working together to shape crop health and yield. That’s why, in Kai Thota, the very first step is always to care for the soil. We test it, observe it, and nurture it. This section is about building a true relationship with the land: learning to understand what the soil needs, restoring it if it’s weak, and planning crops in ways that keep it fertile and thriving, season after season.
01. How Can You Test the Soil?
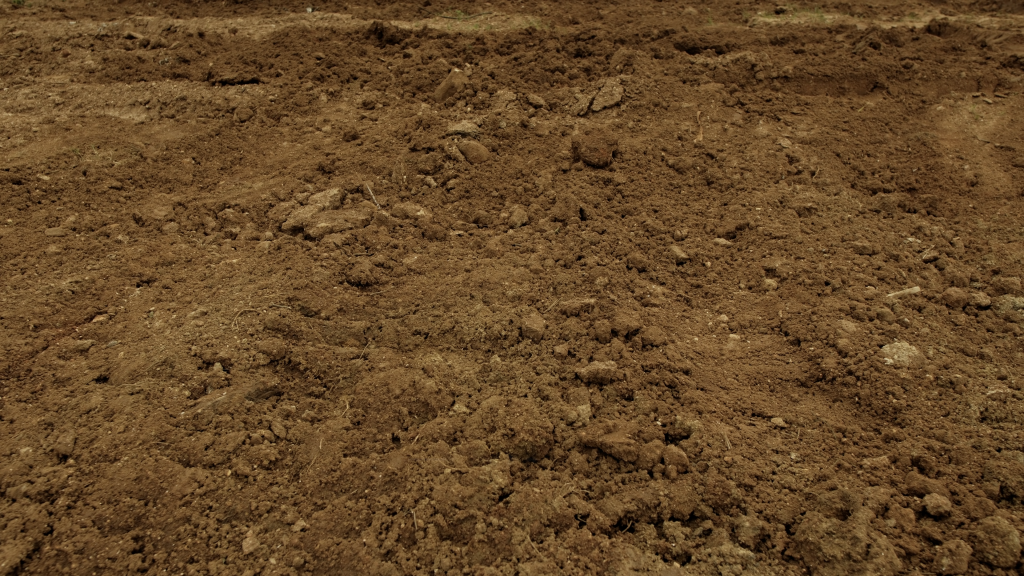
Good soil means healthy crops. Testing soil helps us understand what it needs—like giving food to our plants. It tells us if soil is too dry, too hard, or missing nutrients. This helps us choose the right crops, irrigation methods, and avoid wasting time, effort, or money.
Before you test, you need to collect the right soil:
Take samples from 6 to 7 different spots in your farm.
For vegetables, dig up to 1 foot deep.
Mix all the samples together in a clean container.
💡 Tip
From this mix, keep aside a small portion—just 3 grams—if you’re sending it to a lab.
“We sent the soil from our farm to a lab to understand it better. You can send you soil for testing” ____ Shivamma
Three simple methods to start understanding your soil
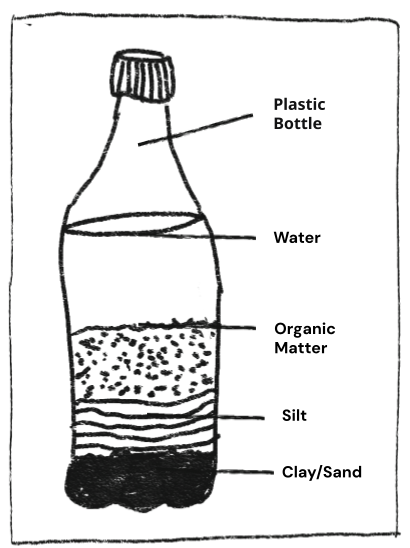
Bottling Method
You will need your soil mix and any clear bottle
Put some of your soil mix in a clear bottle with water. Fill one-third of the bottle with the soil mix and the rest with water.
Shake it well and let it sit overnight. Do not move the bottle or disturb your mix!
The soil will settle in layers: dark bits on the top (like organic matter), fine soil in the middle (like silt), and heavy stuff at the bottom (like sand or clay).
The size and colour of each layer can tell you what your soil is made of and what it might need.
💡 Tip
Look at the top dark layer after the soil settles. This layer shows the organic matter. If it takes up about one-third your entire layer, your soil has good organic content. The more of this dark layer you see, the healthier your soil is!
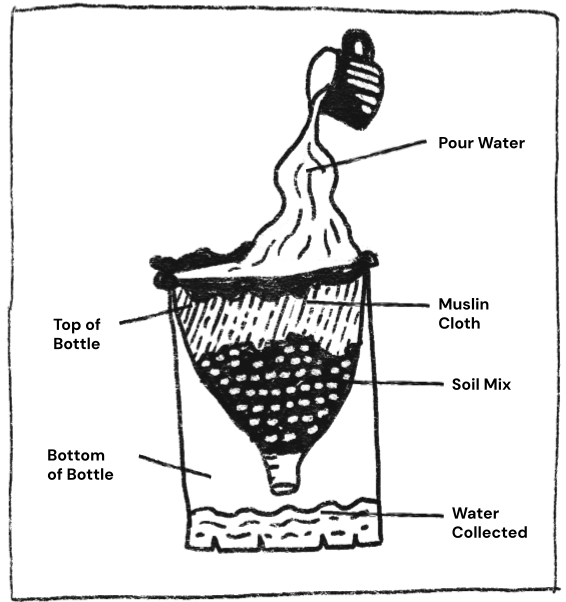
Funnel Method
You will need your soil mix, a plastic water bottle (the ones that have a tapering top, like thumbs up) and a muslin cloth
Cut the top tapering part of the water bottle to create your own funnel (link to video/ sketch)
Put a muslin cloth inside this funnel and add some of your soil mix to this funnel.
Place this over another container and carefully pour water on the mix. Make sure you don’t end up flooding the soil mix too much!
It can take several hours for the water to drain through. How much time it takes shows you how your soil holds or drains water.
💡 Tip
Fast-draining soil may dry out quickly; slow-draining soil may stay too wet and this is important for crops like leafy greens and root veggies.
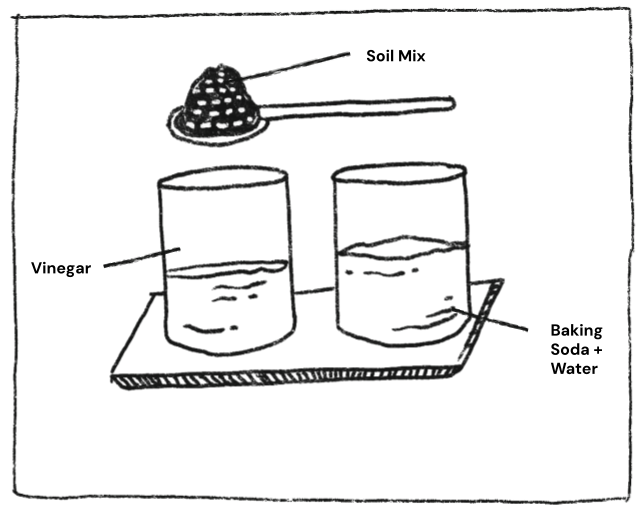
pH Test
You will need your soil mix, vinegar, baking soda, water and 2 small containers
Mix a small amount of your soil with vinegar in one container. If it fizzes, the soil is alkaline (basic).
Mix your soil with baking soda and water in another container. If it fizzes, the soil is acidic.
If no reaction happens when you mix the soil with vinegar and baking soda, the soil is likely neutral.
📖 Advanced Terms
🌟pH tells you how healthy your soil is and if it can be used to grow different types of plants. It measures if the soil is more acidic or more alkaline.
🌟Acidic: if your soil is acidic, it has low pH. This means that some nutrients that your soil really needs like phosphorus could be less present. Acidic soil also increases some toxic elements like aluminium in your soil which can damage your plant roots in the future!
🌟Alkaline: if your soil is alkaline, it has high pH. This means your soil may have more calcium carbonate which may make it hard and chalky. In the long term, this can affect your soil health by making some required nutrients less available. Your plants could end up with yellow and curled leaves or purple stems!
🌟Balanced pH: Your soil should have a balanced pH, not too acidic, not too alkaline, for good health and plant growth. This makes sure that all required plant nutrients are present for your plant roots to soak up.
While these simple home tests help you start understanding your soil, lab tests give you more accurate details about the health of your soil. You can use your home tests to get a rough idea but do consider sending a small sample of your soil mix to a nearby lab for a full test. This will help you understand what nutrients are missing and also help you plan better. Together, both methods give you a full picture—one is easy and quick, the other is detailed and precise.
Home tests are a great first step to understand your soil—its texture, how it drains, and general health. They help you observe and learn from your land. But for more exact information, like pH levels and missing nutrients, lab tests are very useful. Together, both methods give you a fuller picture—home tests help you notice changes, lab tests help you make better decisions.
02. How Can You Keep the Soil Fertile?
Step 1: Prepare your soil before you start producing
Once you test your soil, you may find that your soil is degraded. Green manuring is a process that you can follow to nurse your soil back to good condition.
Green Manuring
Green manuring is a way of farming that helps bring life back to the soil. In this method, farmers grow special plants, not to harvest, but to mix back into the soil for the sole reason of improving the soil condition. These special plants add natural matter, give the soil more nitrogen, and make it soft and healthy. They also help grow good microbes and fungi in the soil.
Follow these steps for Green Manuring-
Loosen the soil Break up the top layer of the soil gently with your tools so the seeds can go in easily. Make sure you do not dig too deep
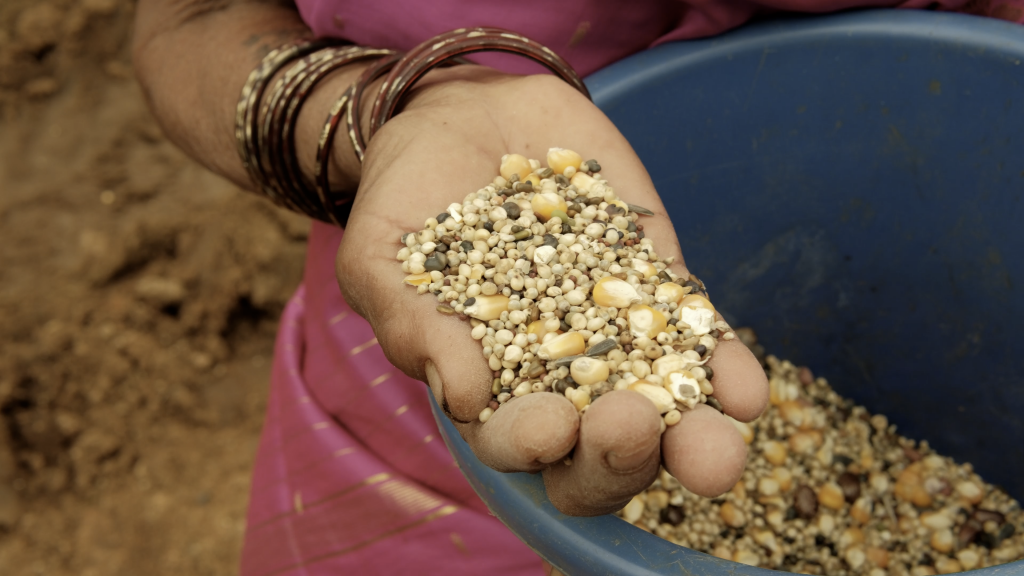
Seed selection You will need 9-17 seed varieties. Choose them based on the season, what’s available nearby, and what your soil needs.
Here are some commonly used seed combinations that you can try using-
Legumes: Horse gram, green gram, urad dal (for nitrogen fixation)
Oilseeds: Sesame, flax (for biomass)
Cereals: Ragi, foxtail millet (for root diversity and structure)
Others: Sunhemp, cowpea (for quick growth and coverage)
📖 Advanced Terms
🌟 Nitrogen fixation means getting nitrogen into your soil. This will help make your soil more fertile without using chemical fertilisers.
🌟 Biomass is like natural compost.
🌟Root diversity is needed because some roots go deep into the soil and some do not. Having both types of roots helps the soil stay loose, brings up nutrients from deep down, and supports more soil life.
Sowing
Seeds are spread over the farm by hand
The goal is to densely cover the soil, so don’t worry about spacing out the seeds!
Growth Period
Allow the plants to grow for about 45-60 days
When 20-30% of the crops start flowering, you can begin the next part of the process
Final Stage
Gently dig and mix the green plants into the top layer of the soil. This adds natural food and other nutrients to the soil.
Press down the plant stems near the ground without pulling them out. This makes a cover on the soil that breaks down slowly and keeps the soil healthy. It also protects the helpful fungi in the soil.
💡 Tip
For very weak or damaged soil, farmers use Velvet Beans (Mucuna pruriens). This plant grows fast and covers the ground like a blanket. It helps stop weeds and keeps the soil moist. It also adds nitrogen to the soil. Farmers leave it on the land for a few months, or even up to a year, if the soil is in very bad shape. It is not used in vegetable beds because it spreads too quickly and takes up too much space.
“We used velvet beans for a year—we saw a huge difference. From tight or dead soil to something healthy, living, and fragrant.” ____ Vishala
Step 2: Rebuild your soil for the next cycle
“In a Kai Thota, you’re always sowing, harvesting, replenishing. It doesn’t stop—it just flows.” ____ Selvi
The Kai Thota method encourages you to grow crops round the year. But for this to work, your soil needs to stay healthy — and that means giving it food, cover, and rest between growing cycles.
Below are some simple, low-cost ways to nourish and protect your soil before the next crop. You don’t have to follow every step at once — just pick what works best for your land, time, and resources. You can cycle through these methods throughout the production to keep your soil strong and full of life.
Crop Rotation
If you want to grow crops all year round, it’s important to think about rotating your plants. This means not growing the same crop in the same bed every time.
You can start with a few simple changes, depending on the weather and what’s in demand at the market:
Follow leafy vegetables with root crops.
After growing heavy feeders like brinjal or tomato, switch to light feeders such as legumes.
After cereal, try planting pulses.
This helps as each plant uses and returns different nutrients to the soil. Rotating crops keeps your soil balanced and stops pests from coming back.
You should ideally plan your crop rotation before planting your next batch and decide what goes where.
Resting Beds
Alternatively, you can also give some beds a rest. For example, if you have 10 beds, pick 1 or 2 beds to leave empty for a few weeks (or 30-45 days).
💡 Tip
You can do this especially when:Your soil feels too hard or dry,There’s been a pest or disease issue in a particular area — resting the bed can help break the cycleCrops there have been growing slower or giving lower yield
Letting the soil rest gives it time to recover, hold more water, rebuild nutrients, and invite helpful organisms like worms and microbes back in.
Caring for Resting Beds: To give your soil an extra boost during rest periods or between production cycles, you can try some simple methods:
Green Manure: You may remember green manure – it’s when you grow special plants, not to harvest, but to mix back into the soil.
You can grow them in between crops or during rest periods
Bend, turn or mix them into the soil, once they start to flower
It’s a simple way to keep the soil rich and full of nutrients
Keep What’s Left – Mulch and Residue After harvesting, don’t throw “the waste” away!
Leave behind crop remains like stems, dry leaves, straw or weeds
Pile and cover the soil with the mixture and let it sit, especially after green manuring
This is called mulching, and it helps:
Keep the soil moist
Stop weeds
Feed the microbes below the surface
Using Weeds Smartly We know that not all weeds are bad. Some, like amaranth or bhangra, are very helpful. When cleaning your farm, pick these weeds separately. You can use them to make fermented weed tea—a natural fertilizer made of chopped weeds and biowaste, poured near your crop roots to help them grow better.
How to Make Fermented Weed Tea:
Collect Weeds: Gather a variety of weeds, including nutritious ones like amaranth or bhangra, and chop them into small pieces or a mash.
Place the chopped weeds into a large bucket or container, filling it to about three-quarters capacity.
Cover the weeds with water, using rainwater if possible, to completely submerge the plant material.
Cover the bucket to ferment this mixture with a loose lid or screen to keep out insects while allowing gases to escape.
Stir the mixture regularly for a period of one to four weeks. The process is complete when the weeds have mostly dissolved and the liquid turns a dark brown color.
Once the fermentation is complete, strain out the solid plant material using a sieve or muslin cloth, keeping the liquid for use as fertilizer.
How to Use Fermented Weed Tea:
Soil Drench: Use the tea as a direct fertilizer by pouring it onto the soil around the base of plants.
Spray: You could alsodilute the tea with water until it is the color of weak tea and use a spray bottle to apply it to the leaves of plants for foliar feeding.
📖 Advanced Terms
🌟 Foliar Feeding is a technique where nutrient-rich liquids, like fermented weed tea or Dashaparani, are sprayed directly onto the leaves. This helps the plant quickly absorb food and nutrients through its leaf surface.
🌟You can do this using a spray bottle — this is called a foliar spray.
🌟Why it’s useful:Works faster than soil feeding.
Helps when plants look weak or sick.
Best for small nutrients (micronutrients).
Good for quick fixes, not for giving big amounts of food.
These small practices—resting your beds, rotating crops, mulching, and feeding the soil—may seem simple, but they’re powerful. Done consistently, they keep your land fertile, reduce the need for outside inputs, and make it easier to grow healthier plants. Every harvest becomes the foundation for the next. 🌱
Ps: In the upcoming chapter, you’ll learn how to protect both your soil’s fertility and your crops’ health as they grow.
Farming is no easy job. But understanding your land and using the right—yet simple—tools can make daily chores easier. A well-built fence keeps your field safe, and giving your crops just the right amount of water with the right method helps you get the most from your work and resources. When you get these basics down, you work smarter, save time and money, and give your plants the best chance to thrive.
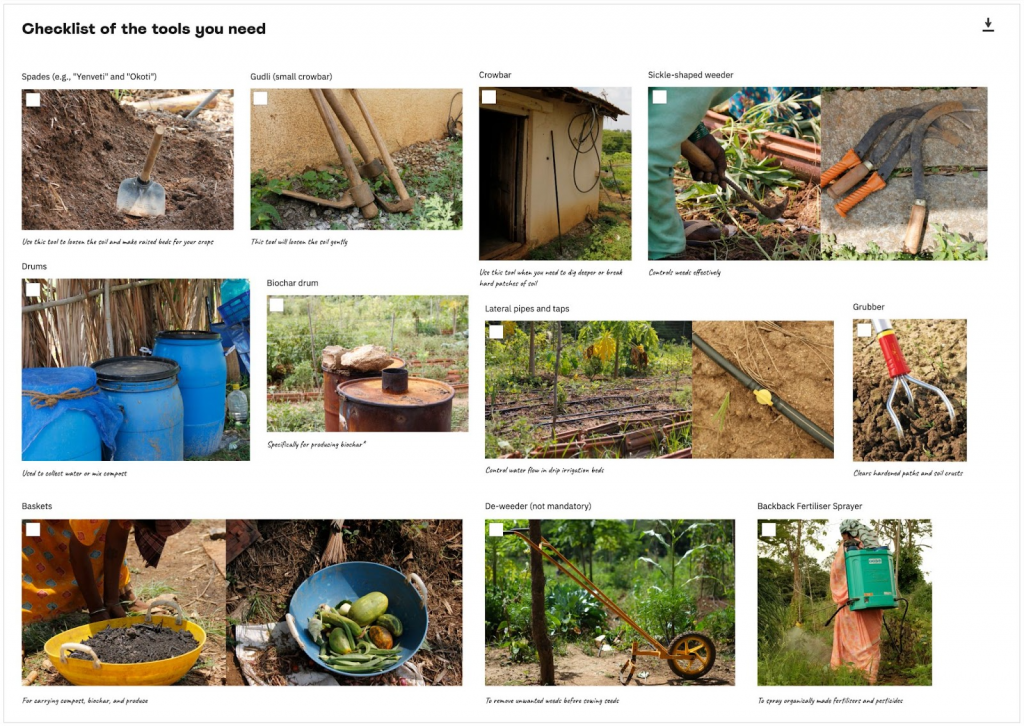
01. How to Choose the Right Tools?
Choosing and getting the right tools really depends on your soil, the size of your farm, and what feels easy for you to do.
If your soil is soft and healthy, you can use lighter tools and they can make jobs like digging and weeding much easier. Hard or packed soil needs tools strong enough to break it. Once you understand your soil, it’s easier to pick the right tools.
Preferably choose tools that are locally made or available to ensure easy maintenance and regular service. Doing this will save you time and effort as well as help your plants grow well!
📹 You can learn about different types of tools through this video
Maintaining your tools and storing them the right way is very important. Here are some quick ways in which you can do so-
1. Clean your tools after every use. If they remain muddy, they will start to rust. 2. Regularly sharpen your cutting tools like sickles. 3. Check the handles of the tools for cracks or damage 4. Check irrigation pipes and taps often for leaks or blockages. 5. Keep your tools in a dry, covered room. 6. Oil your tools regularly so they don’t break easily
02. How Can You Set Up Fences?
📹You can learn about fencing by watching this video
Keeping your farm safe starts with a good fence. It helps protect your land from animals and also shows others where your farm begins and ends. It also protects your crops from theft. The kind of fence you choose depends on where you are and what your farm needs-
Here are some ideas to start setting up your fences:
Solar Fencing
This is a strong fence that uses a small electric current to keep animals out. It’s really helpful if your farm is close to a forest and animals wander into your farm. It may be costly, but it is effective and very easy to use.
“Our farm is protected by a solar fence. We live in an area where we have a lot of wild animals, so when we switch on the fence, it becomes electrified. It does not harm the animals, but it is enough to keep them away.” ______ Lakshmi
Live Fencing
This is made by planting local thorny bushes, like Karamul and Agave around your farm. It’s cheap, good for the land, and can give you fiber or firewood. Over time these can be used again in your farm as support systems for plants or to improve your soil. will prevent animals from entering your farm, but they need some care and upkeep over time.
You can protect your farm using other materials like wire, nets, stone, wood, and other resources that are more available to you!
No matter what fence you choose, it’s good to leave at least 4 feet of space between your crops and the fence. This gives you a path to walk around and enough space for plant root systems to grow.
4-ft perimeter around the farm
03. How Can You Manage Water Supply?
Water management is one of the most important parts of farming. Knowing how to give just the right amount—at the right time—can help your crops grow better and save you from problems like flooding or dry soil.
There are two ways you can get water into your farm
Flood irrigation method
This method is used when there’s plenty of water around you. Water from nearby sources like a pond or a borewell can be brought in using cans or buckets. It is then poured into channels made along the crop beds. From there, the water spreads and slowly reaches the roots from the sides. This method works best on flat land. However, it can waste water and sometimes cause problems like flooding, waterlogging in the soil or loss of nutrients.
Flood or Furrow irrigation: traditional, simple, and ideal for flat fields with abundant water.
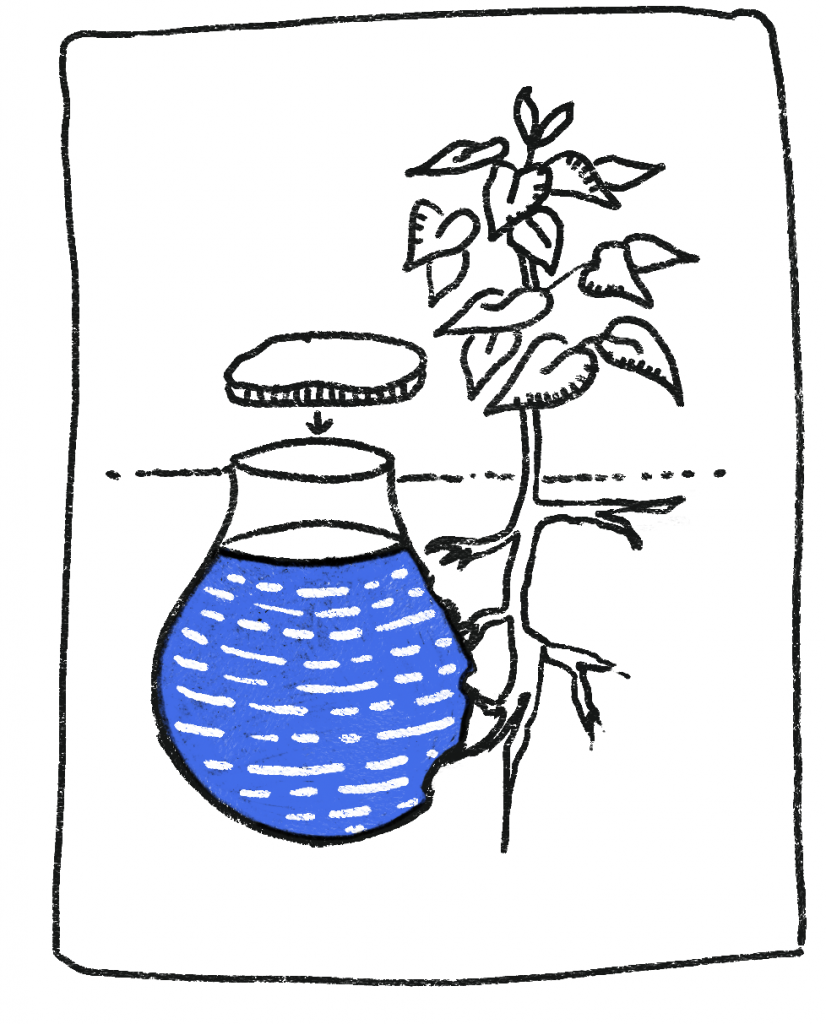
Pot Irrigation
Pot irrigation (also called pitcher or olla irrigation) is an old and smart way to give water to plants. A clay pot with tiny holes is buried in the soil near the plant. When the pot is filled with water, it slowly releases water into the soil, right where the roots need it. This method saves water, reduces waste, and keeps the soil moist for a long time. It works very well in dry areas where water is limited, and is particularly great for small gardens or kitchen plots.
Pot irrigation: simple, sustainable, and perfect for small gardens.
Sprinkler Systems
Sprinkler systems work like artificial rain. Water comes through pipes and is sprayed into the air through rotating or fixed heads, falling gently on the crops. This method is good for plants that grow close together, like leafy vegetables. It saves time and covers a large area quickly. But it works best when there is no strong wind, so the water doesn’t blow away.
Sprinklers: saves time, covers large areas, and supports uniform crop growth.
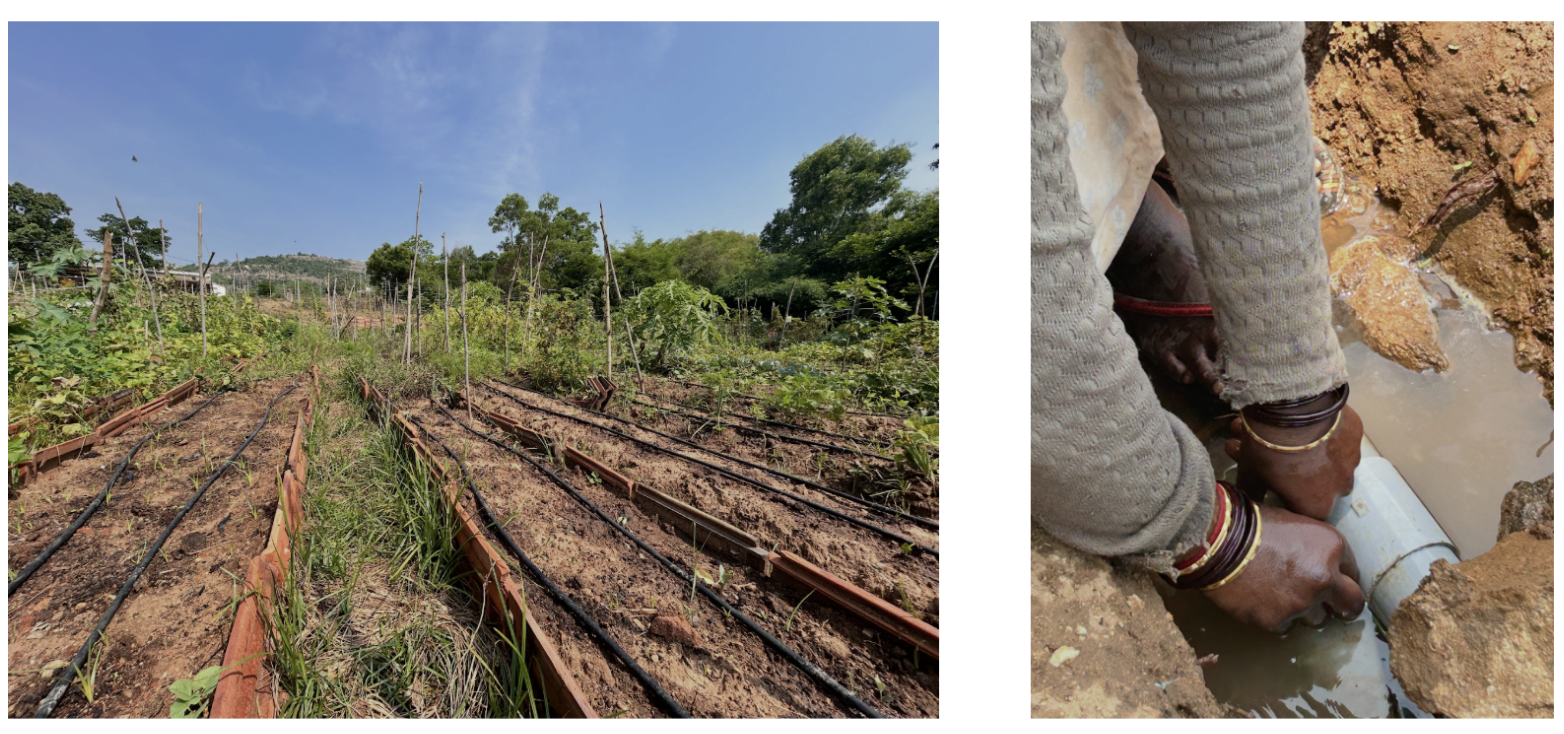
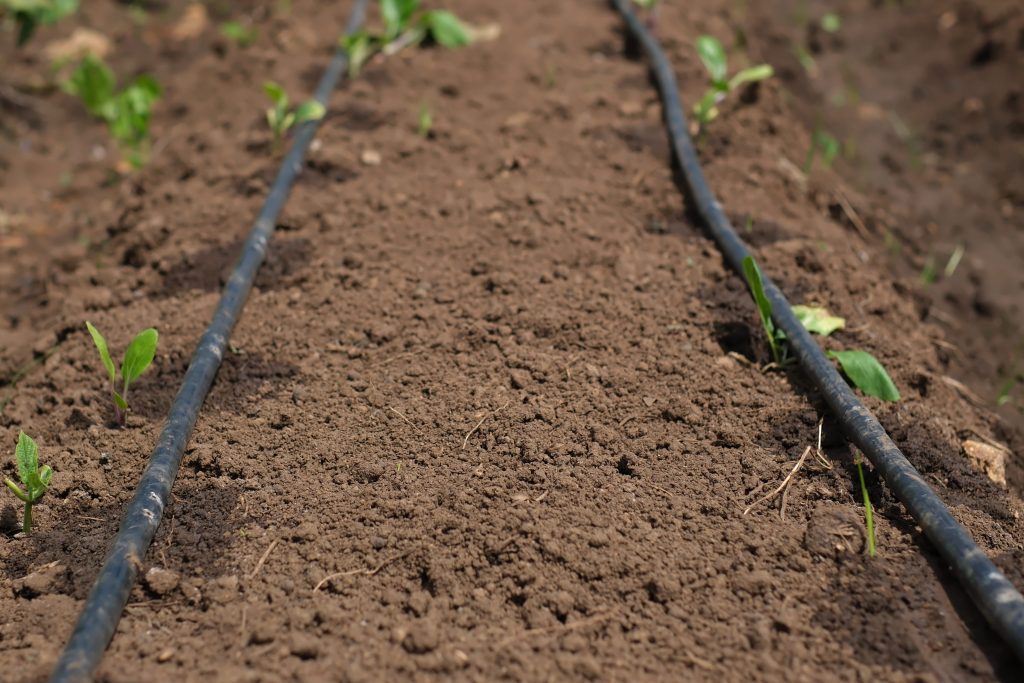
Drip Irrigation:
Drip systems use small pipes that run along the beds, with taps to control how much water each bed gets. Each pipe comes from some kind of water source like a tank or borewell with a pump nearby. This is a better and more careful way to give water to plants. It sends the correct amount of water straight to the roots, ensuring the management of soil moisture. Farmers say plants don’t need too much water, just steady moisture.
The main components of a drip irrigation system include the mainline, lateral lines, emitters, and valves.
Using this method saves water, makes sure your farm does not flood, and helps the roots grow deep and strong, especially when plants are flowering or making fruit. This method is a little more costly but is preferable because you will not suffer damages because of extra water, flooding, etc.
💡 Tip
Regular maintenance of drip lines and valves, including cleaning them with a microbial wash, is also important and should be part of the irrigation routine.
“You can put liquid fertilizer into the pipes as well, so plants get food while they drink!” ____ Shivamma
Both flood and drip systems are in use at Kai Thota, and you can choose either, depending on where your farm is located and the availability of water. Other systems like sprinkler/pot irrigation may be opted based on access and use.
Choosing the right tools, fences, and water systems may seem small, but these decisions save time, reduce effort, protect your crops, and make your farm more productive. With the right setup, your soil, plants, and harvests will all thrive.
Kai Thota is built on three promises that form the foundation of everything we do:
Care for the soil and environment
Nourish the people who eat from the farm
Ensure dignity and safety for the women who grow the food
Think of these promises like the roots of a strong tree – from them, everything else grows and flourishes. And, to live by these promises, we follow a way of farming called Permaculture.
01. What Is Permaculture?
The word permaculture may sound big, but the idea is simple-
Notice what’s happening around you
Respect the natural systems at work
Care for the land, the community, and yourself
Think of permaculture as building healthy relationships between all the living things on your farm. It’s like creating a circle where every part supports another:
The soil feeds the plants > The plants provide food for animals and people > The animals enrich the soil > People tend the system and share its abundance = Everything works together!
Permaculture works through three simple pillars that guide and anchor the practice
Permaculture Pillars: Earth Care, People Care and Fair Share
A. Earth Care– Take care of the land
Protect the soil, water, plants, and animals around you.
Treat the land as a partner, not just a resource.
Think of your actions as a promise to the Earth for the life it gives you.
⭐ This means using natural fertilisers instead of chemicals, saving water, and planting in ways that maintain soil health and support different plants and animals living together.
B. People Care– Take care of each other
Support the well-being of all members of your community.
Share food, water, shelter, knowledge, and labor.
Build systems that allow people to thrive together.
Remember that thoughtful farming grows stronger when the community is cared for.
⭐ This involves helping each other with farm work, sharing resources, and making decisions together so no one is left behind.
C. Fair Share (or Return the Surplus)– Take only what you need and share the rest
Respect the limits of nature—don’t take more than your fair portion.
Share any extra food, energy, or resources so everyone benefits.
Give back to the Earth and community so the cycle continues.
⭐ This means sharing surplus harvest with neighbours, returning organic waste to the soil as compost, or using only the water you need so there’s enough for others and for future generations.
Principles
It also has 12 key principles, which are like ‘rules of thumb’ that guide us in making decisions, designing farms, solving problems, and living in balance with nature and our surroundings.
The Rule
In Practice
An Example
Observe and Interact
Notice where the sun shines longest, where water flows after rain, and which areas stay moist. By observing these patterns first, you work with nature instead of against it.
Study which part of your farm gets morning sun before deciding where to plant.
Catch and Store Resources
Save and store resources when there are plenty to use later
Collect rainwater in a drum to water plants during hot and dry days.
Obtain a Yield
Make sure your efforts produce something valuable, where every activity should help your farm and your community.
Plant vegetables or fruit trees to eat, share, or sell.
Learn and Adjust
Let your farm teach you what it needs. Watch results and change your actions if needed.
If plants consistently fail in one area, try shade-loving crops, or add manure
Use and Value Renewable Resources
Rely on resources that can naturally renew (things that come back naturally) themselves, like sunlight, wind, and water.
Use solar energy for your fences and pumps
Produce No Waste
Find uses for everything- What seems like waste to one part of your system becomes food for another part.
Turn weeds, peels, and scraps into compost to feed your soil instead of throwing them away.
Look at the Whole, Then the Parts
Study your farm and its qualities carefully first, then plan the details—like where to plant and what to grow.
Map water sources before deciding where to plant each bed.
Together is Better
Create helpful relationships between different parts of your farm
Plant flowers near vegetables to attract bees for pollination.
Use Small and Slow Solutions
Start simple and grow step by step
Begin with a few plant beds before creating a whole farm
Value Diversity
Variety brings strength and stability.
Grow different types of crops and herbs together to reduce pests naturally.
Use Every Part of Your Land
Grow on field edges and use ignored land. There are benefits here
Plant along fences or borders to make the most of space.
Adapt to Change
Turn challenges into opportunities and problems into creative solutions.
If your soil is poor, add mulch and green manure to slowly improve it.
02. Why Does This Matter For You?
The big concepts of Permaculture trickle down to simple everyday practices that make life better for you, your farm, and your community.
Caring for soil protects future harvests. Growing different crops and welcoming birds, bees, and animals reduces pests naturally. Working together—sharing seeds, tools, and knowledge—saves money, time, and strengthens your community.
These practices give you control over your food, including fresh vegetables for your family and extras to sell, making you less dependent on the market. Most importantly, they make you stronger against drought, floods, and price changes.
In short, Permaculture doesn’t just help the earth — it helps you too. It means healthier food, steady income, and community support, while keeping the land safe for you, your children, and future generations.
03. How To Start Your Journey?
In the upcoming chapters, you will see how to use the principles of permaculture in small, simple steps on your own farm.
Every tip, every step, every decision is a way to strengthen your farm and community, without making big changes all at once.
For now, you can start by adopting some of these key attitudes:
Become a Careful Observer: Spend time in your fields at different times of the day and different seasons. Notice where birds nest, which plants thrive where, and how water moves after rain. This observation becomes the foundation for all your decisions.
Take Responsibility for Your Part: Do your part on the farm and in the group. Learn from your work and help others do their best.
Practice Generous Sharing: Share seeds, tools, knowledge, and tips with your group. Help each other succeed.
Learn Through Trying: It’s okay to make mistakes. Try new ways, see what works, and improve over time.
Lead with Respect: Treat the land, plants, animals, people, and resources with care
Organising a collective begins with people coming together. What matters most is not the form—whether it’s a savings group or simply neighbours—but the trust, shared values, and willingness to work side by side.
Once that spirit is in place, everything else can follow: how you organise yourselves, how you share work, and how you seek support.
01. Who Can Form a Kai Thota Collective?
A Kai Thota collective can begin with existing Self-Help Groups (SHGs). Groups that already meet regularly and are built on trust, savings, and shared responsibility—making them a natural starting point for farming.
But it doesn’t have to be an SHG. Any group that meets regularly with a shared purpose can become a farming collective:
Mahila Mandals or Kisan groups
A temple, church, or mosque congregation
A water user group
A local youth club Even a neighbourhood WhatsApp group
What matters most is that people meet, talk, trust one another, and share common values—especially around working together, sharing labour, and respecting the land.
💡 Tip
If your group isn’t already formal, you can register it later as a joint Self-Help Group (SHG), a Farmer Interest Group (FIG), a Mutual Benefit Society, or a Cooperative. You could also just simply maintain a record of names, meetings and decisions. For many schemes, even this informal structure is enough to begin.
02. What are Some Ways You Might Work Together?
Once your group is formed, it’s important to agree on how decisions will be made and how responsibilities will be shared. This helps avoid confusion later and gives everyone a sense of ownership and clarity.
Many Kai Thota groups follow simple practices inspired by SHGs:
Rotational leadership – Change roles every 3 to 6 months so that everyone learns and no one feels overburdened.
Basic bookkeeping – Use a ruled notebook or passbook to track income, expenses, meetings, and harvests.
Regular meetings – Meet weekly or every 15 days to plan work, solve problems, and review progress.
Key Roles of the Group Leader
Helps guide the group and calls for meetings.
Tracks income, expenses, subscriber lists, and minutes of group discussions.
Communicates with the Panchayat, officials, or NGOs on behalf of the group.
Plans daily or weekly farm activities and makes sure work is divided fairly.
💡 Tip
You don’t need formal elections. Start with who’s comfortable, then rotate every few months.
03. What might be important to talk about early on?
Before starting farming as a collective, it’s important to sit together and discuss key topics. These conversations help everyone understand their role, avoid confusion later, and ensure the group works fairly and smoothly.:
What to grow? And where?
Decide together which crops, vegetables, or plants you want to grow.
Look at the land and think about sunlight, soil, and water availability.
How will produce or profits be shared?
Agree on a fair way to divide vegetables, fruits, or money from sales.
All members should share the produce and profits equally, regardless of their role or position in the group.
What if someone misses farm work regularly?
Discuss rules for attendance and participation.
Decide how to support members who cannot come regularly due to work, health, or family duties.
How will we include members who can’t read, write, or speak confidently?
Some members may not read, write, or speak confidently. Plan ways to include everyone in decisions and farm work.
Show how it’s done, explain it, and repeat instructions so everyone can learn by doing.
Pair less confident members with others for guidance and support.
Other conversations to have-
How to handle disputes or disagreements in the group.
Safety measures on the farm (tools, water, etc.)
Scheduling weekly or bi-weekly meetings to plan, review, and celebrate progress.
Inclusion is important. Design your group in a way where everyone can participate—no matter their background, education, or confidence level.
04. How Can the Panchayat SupportYou?
Your Gram Panchayat is an important supporter. Many collectives succeed because they engage early and consistently with local governance. Your Panchayat can –
Help you identify unused commons or public land
Approve small infrastructure works (like a compost pit, fencing, or bunds)
Recommend you for government schemes
Support you in applying for schemes or subsidies and also support large cluster development in case your group is eligible
Connect you to horticulture officers for saplings or compost from the State Rural Livelihoods Mission (SRLM) or National Rural Livelihoods Mission (NRLM)
How to Approach Your Panchayat?
Speak to the Panchayat members, Panchayat Development Officer (PDO)/Gram Panchayat Level Federation (GPLF) coordinators about your intentions and needs
Attend Gram Sabhas & The Special Gram Sabhas (Jan 26, Aug 15, Oct 2) and present yourselves as a group
Present a simple plan:
Who you are
Why you want to farm together
What kind of land/support you need
Ask for a letter of support, even if verbal permission is already given.
💡 Tip
The group leader and record keeper can keep a small folder with the following information and documents, especially when presenting yourself to the panchayat:
1. Group list (SHG or collective) 2. Aadhaar photocopies of members 3. A vert simple proposal in Kannada (2-3 paragraphs) 4. Photos of the group members 5. Bank account details (SHG or one lead member) 6. An previous training or scheme registration documents (if applicable)
Resources:
Glossary:
Groups and Collectives-
Self-Help Group A small group of people, typically 10–20 members, who save money together, provide small loans to members, and support each other financially and socially.
Farmer Interest Group (FIG) A group of farmers organised to collectively plan farming activities, share knowledge, and access resources or government schemes for agriculture.
Mutual Benefit Society A legally registered organisation where members pool resources or funds for shared benefit, often for livelihood or community development.
Cooperative A formally registered group where people work together for farming, marketing, or business, and share profits and responsibilities.
Government Programs and Missions-
National Rural Livelihoods Mission (NRLM) A national program that helps poor families in villages form SHGs, earn income, and get skill training.
State Rural Livelihoods Mission (SRLM) The state-level program under NRLM that helps SHGs and farmer groups improve incomes and livelihoods.
Local Governance-
Panchayat members Elected members of the Gram Panchayat who make decisions and manage local village work.
Panchayat Development Officer (PDO) A government officer who helps the Panchayat plan and run village programs.
Gram Panchayat Level Federation (GPLF A group made by bringing together several SHGs in a village to coordinate, access schemes, and work collectively.
Gram Sabhas A meeting of all adults in a village to discuss development, resources, and schemes are discussed and approved.
The Special Gram Sabhas Gram Sabha meetings are held on national days such as 26 January, 15 August, and 2 October to discuss important village matters and present proposals for approval.
Finding land is the first step for any community farm. You don’t need a perfect plot-what matters most is land that is available, usable for farming, and that your group can care for together. Even simple land can become a great farm if you plan and work on it over time.
“You don’t need perfect land-you just need land that is available, that you can use together, and that you can care for over time. What matters most is that it’s within reach (by walk) and that you can make it work, little by little.” ___ Vishala
01. What Kinds of Land Can You Use?
You can use:
Commons: Village-owned land allocated by the Panchayat
Leased land: Land rented from a private owner (can be formal or informal)
Pooled land: Small plots contributed by collective members or donated by elders
02. What to Look for When Choosing Land?
Once you’ve identified possible sites, use these pointers to decide if the land is truly suitable:
Close to the village – 10–15 mins walking or auto
Free of disputes – avoid land under litigation or tension
Protected area checks – If the land is near a forest, grassland, or protected zone, you may need clearance from the Forest Department. Your Panchayat can help guide you on this.
Water access – even a pond, borewell nearby, or rain-fed options
Soil – not overly compacted or stony; ideally, no recent pesticide use
Shade – at least one tree for the compost area or rest
Security – easy to fence up either with material, naturally protected, or easily visible from the road
💡Tip
Even if the land has no water source yet, you can still begin. Apply through MGNREGA to build a water pit or bund. The Panchayat or MGNREGA field assistant can help with this process
Land Readiness Check-List:
Is the land walkable and not too far?
Do we have permission to use the land? (verbal or written)?
Can compost materials (cow dung, dry leaves) be brought here easily?
Is there a nearby water source or is rainfall collection possible?
Can we fit multi-cropping rows, compost, and nursery?
Does sunlight fall enough for crops to grow and shade for you to rest?


